+971 56 1998402
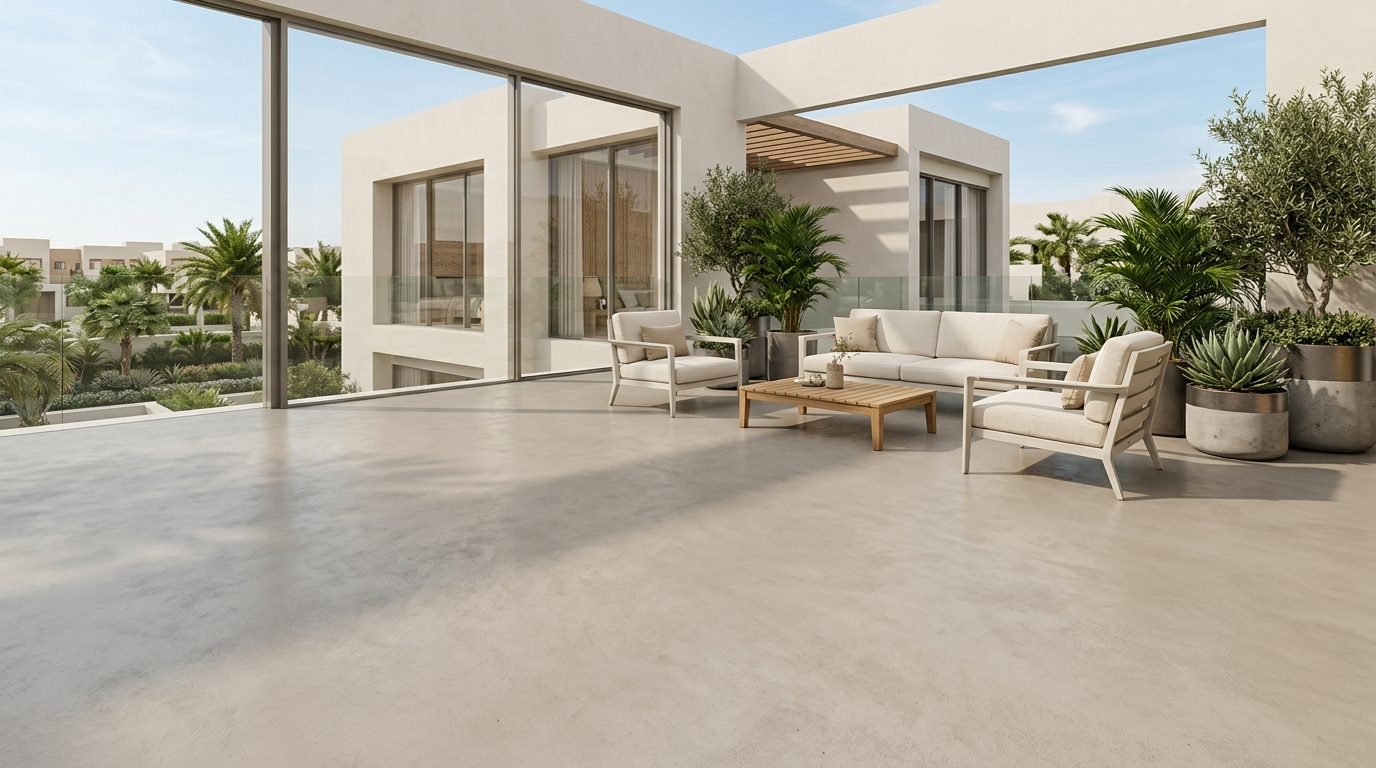
When a floor starts to look tired, most property owners in the UAE assume the only answer is to break it out and start again. That means weeks of noise, dust, skip trucks and a bill that grows with every surprise found under the old surface.
Microtopping offers a smarter route: resurfacing. Applied in a thin layer over a properly prepared surface, it gives floors, walls and counters a completely new look without demolition.
At Good Hand Stones & Concrete Flooring LLC, microtopping is one of our most requested finishes. In this guide we explain how it works, where it performs best, and what to check before you commit.
Microtopping, also called microcement, is a thin, cement-based decorative coating. It is applied by hand in several layers, then sealed to protect it. The result is a continuous surface with no grout lines and a soft, hand-finished look.
In the UAE the two names are used for the same family of finish. When you compare quotations, ask about the system, the number of coats and the sealer rather than relying on the name alone.
Because the layer is only a few millimeters thick, it adds almost no height and very little weight. That is what makes resurfacing possible.
Many of these spaces were originally tiled. In many cases, microtopping can go over existing tiles once the substrate has been inspected, cleaned and primed. Removing the old tiles is often unnecessary.

For our clients at GH Interiors, we have used microtopping to give floors, walls and feature areas a continuous, joint-free finish. Having our decorative concrete team and our interior designers under one group means the finish is planned together with the rest of the design.
Telling you this upfront is part of how we work. We would rather recommend the right system than sell the wrong one.
Is microtopping the same as microcement? In the UAE the two terms are generally used for the same type of thin, cement-based decorative finish.
Can microtopping be applied over existing tiles? In many cases, yes. The tiles must be firmly bonded, and the surface needs proper preparation and priming. A site inspection will confirm.
Is microtopping suitable for bathrooms? Yes, when the substrate is properly waterproofed and the finish is correctly sealed.
How long does installation take? It depends on the area, the number of coats and drying time between layers. We will give a timeline after the site inspection.
How do I get a quote? Send us photos and measurements, or book a site visit, and we will recommend the right system.
Visit our showroom at Al Falasi Building, Salah Al Din St, Dubai, or contact us:
Tell us which room you want to transform, and we will show you how to do it without starting from scratch.
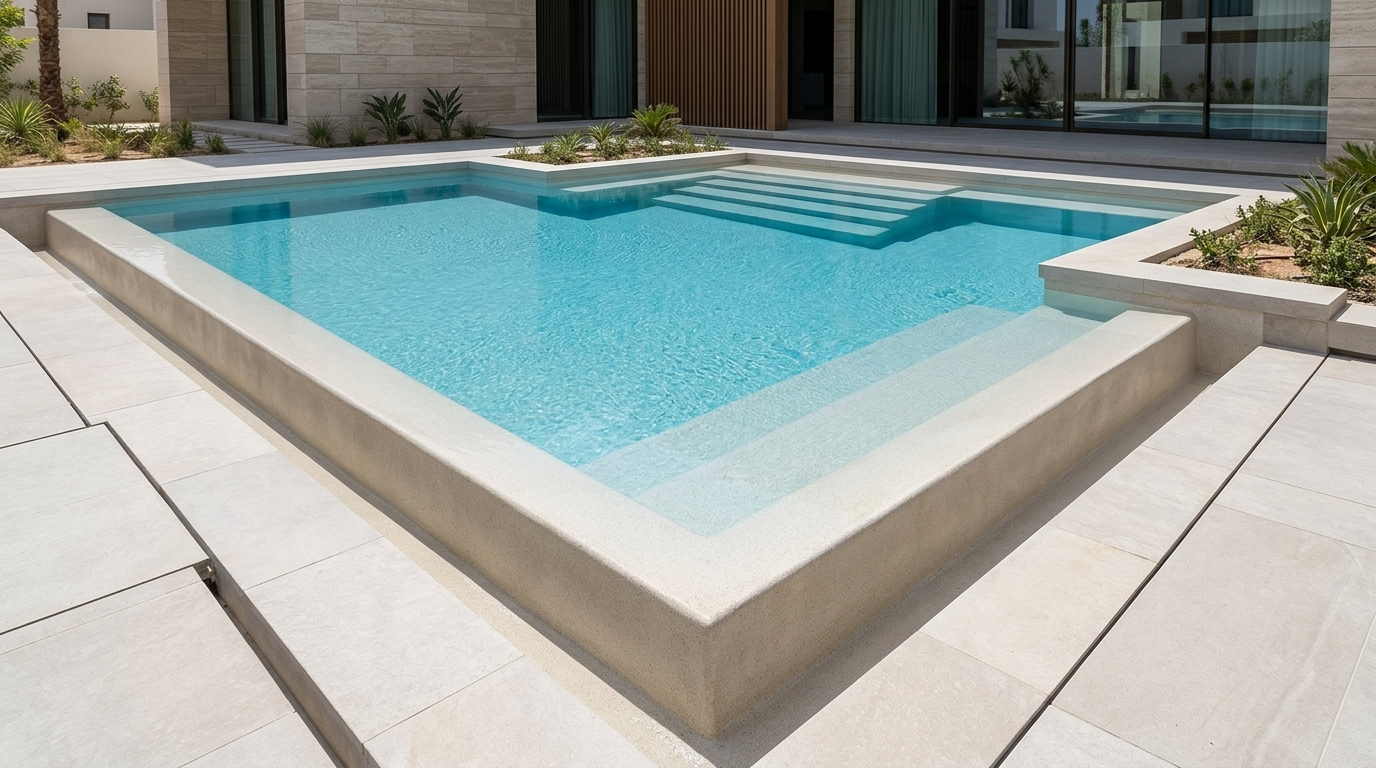
If you’ve had a tiled pool for a few years, you’ve probably started to notice small things — a bit of grout missing here, a tile that feels loose underfoot there. It’s easy to brush these off as minor wear and tear, but in Dubai’s heat and sun, small tile issues rarely stay small. Here are five signs worth paying attention to, and what to do once you spot them.
Grout is the first thing to give in, especially after a few UAE summers. Once you see it crumbling or thinning out, water has an easy path to get behind the tiles — and that’s when the real problems start.
What to do: Don’t just patch the grout and hope. If it’s happening in more than one spot, it usually means the whole surface is aging out, not just that one section.
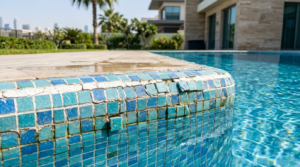
A hollow, slightly loose feeling underfoot is one of the clearest signs a tile has already come away from the surface beneath it, even if it looks fine from above.
What to do: Loose tiles rarely go back down on their own, and they tend to pop off completely at the worst time — usually while you’re swimming.
If algae keeps coming back in the same spots no matter how often you clean, it’s usually because it has a way in — through worn grout or a tiny gap that’s letting moisture and organic material settle in and stay there.
What to do: Cleaning it off the surface won’t fix what’s happening underneath. It’ll keep coming back until the underlying issue is dealt with.
All pools lose a little water to evaporation, but if you’re topping it up noticeably more than you used to, it could be leaking through gaps where tiles or grout have failed.
What to do: This one’s worth acting on quickly — the longer water is finding its way behind the tiles, the more it can damage the structure underneath, not just the surface.
Chipped corners, cracked tiles, or tiles that have shifted out of line aren’t just a cosmetic issue — they’re a safety one too, especially for kids running around the pool barefoot.
What to do: Once tiles start chipping in multiple places, it’s usually a sign of age across the whole surface rather than one bad tile.
None of this is really about bad installation — it’s just what tiles do over time in this climate. Constant sun, heat, and pool chemicals slowly wear down the grout that’s holding everything together, and once one tile goes, the rest tend to follow.
This is exactly why we always recommend a render system instead. A render system is one smooth, continuous surface with no grout lines and no individual tiles to come loose — so there’s nothing for water or algae to get behind in the first place. If you want to see how the two compare properly, we’ve laid it out here: Pool Render vs Tiles.
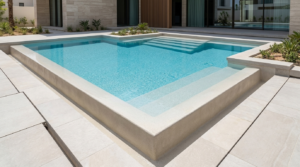
Whatever stage you’re at, we can help:
Across all of this, our pool render system is the finish we reach for the most — and it’s one of our most popular products for good reason:
Whether you’re fixing a pool that’s already showing wear or building a brand-new one, it’s the finish we’d put in our own homes.
Noticing any of these signs in your pool? Get in touch and we’ll take a look.
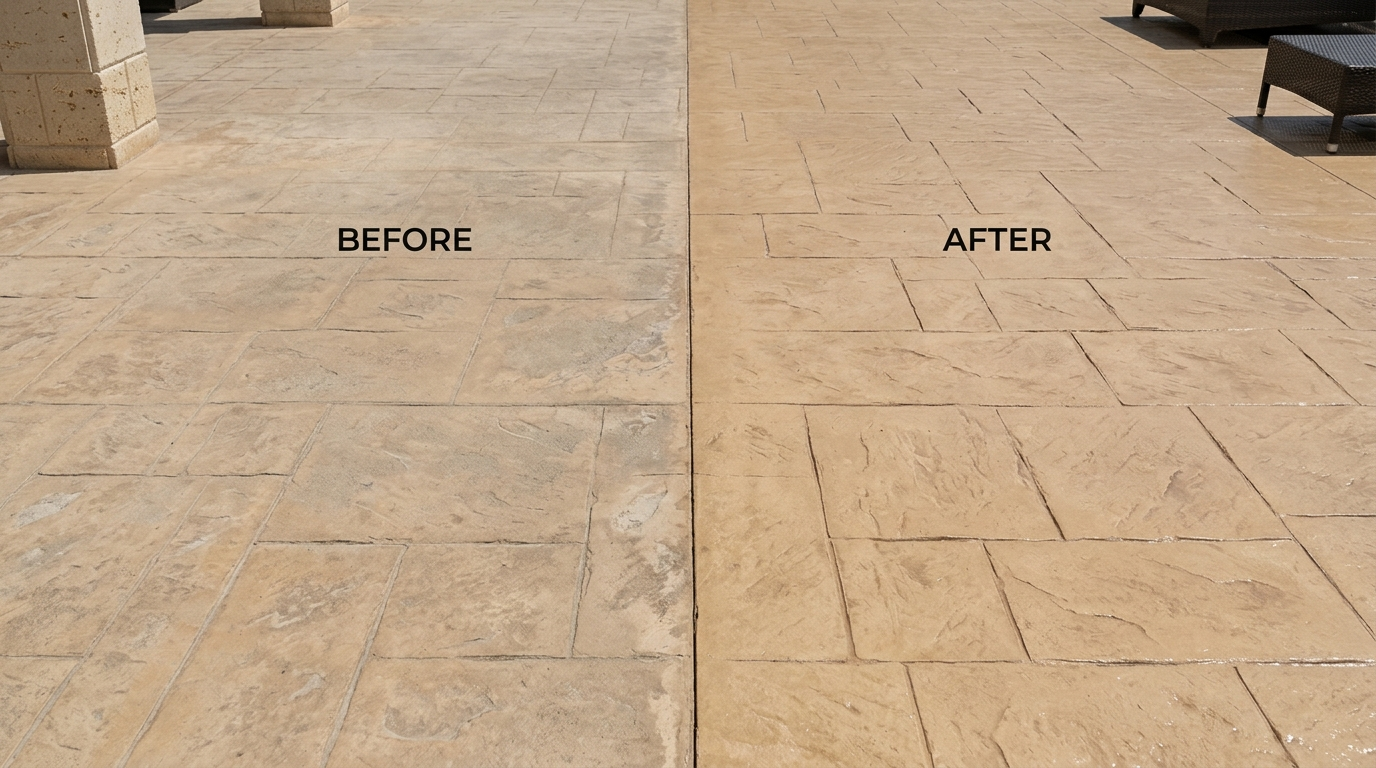
Most homeowners only think about their decorative concrete floor twice: the day it’s installed, and the day it starts looking dull. What happens in between — or rather, what should happen in between — determines whether that floor still looks new in year eight or needs a full replacement by year four.
Dubai’s heat, UV exposure, and dust make maintenance non-negotiable for outdoor stamped concrete, exposed aggregate, and pool deck surfaces. The good news: maintaining a decorative concrete floor costs a fraction of replacing one. Here’s what actually goes into that cost, and how to budget for it.
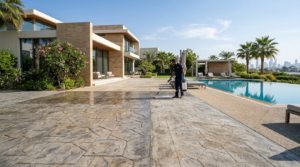
A well-installed decorative concrete floor can last well beyond ten years. The colour fading, dullness, or dirt buildup people mistake for “the floor wearing out” is almost always a maintenance issue, not a structural one. Resealing restores the surface — it doesn’t require tearing anything up.
That distinction matters for cost. Replacing a driveway or pool deck means demolition, new base preparation, and a full reinstall. Resealing means cleaning the existing surface and applying a fresh protective coat. The price difference between the two is significant, which is why a resealing schedule is the single best money-saving habit a property owner can build into their maintenance calendar.
Not every decorative concrete finish ages the same way, and the maintenance interval changes the total cost of ownership over time.
When property owners ask “how much does concrete floor maintenance cost,” the honest answer is: it depends on a handful of factors that any contractor should walk you through before quoting.
The practical takeaway: get a site visit rather than a phone quote. Two floors of the same size can have very different maintenance costs depending on condition and finish.
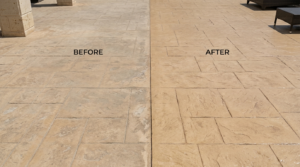
Regular cleaning — sweeping, hosing down, and mild soap-and-water washes — is something any homeowner can and should do between professional visits. It’s free, and it reduces how much grime the sealer has to fight during the next resealing cycle.
Resealing itself is not a DIY job worth attempting on a driveway, pool deck, or feature floor. Sealers need the right surface preparation, even application, and correct curing time — get any of that wrong and you’re left with patchy sheen, peeling, or a slippery surface. The cost of professional resealing is small compared to the cost of redoing a botched DIY job.
Instead of viewing maintenance as an occasional expense, it helps to treat it as a fixed part of owning a decorative concrete surface — the same way a car owner budgets for servicing, not just fuel. Set a resealing reminder based on the finish type above, request a site assessment before the surface visibly fades, and keep records of what was done and when. Floors maintained on a consistent schedule almost always cost less over ten years than floors that are neglected and restored in one large, reactive job.
Good Hand Stones & Concrete Flooring has been maintaining and resealing decorative concrete surfaces across the UAE for over 25 years, covering stamped concrete, exposed aggregate, microtopping, polished concrete, and pool deck renders. If your floor is starting to look dull, faded, or stained, get in touch for a maintenance assessment and a clear cost estimate before it becomes a bigger job.
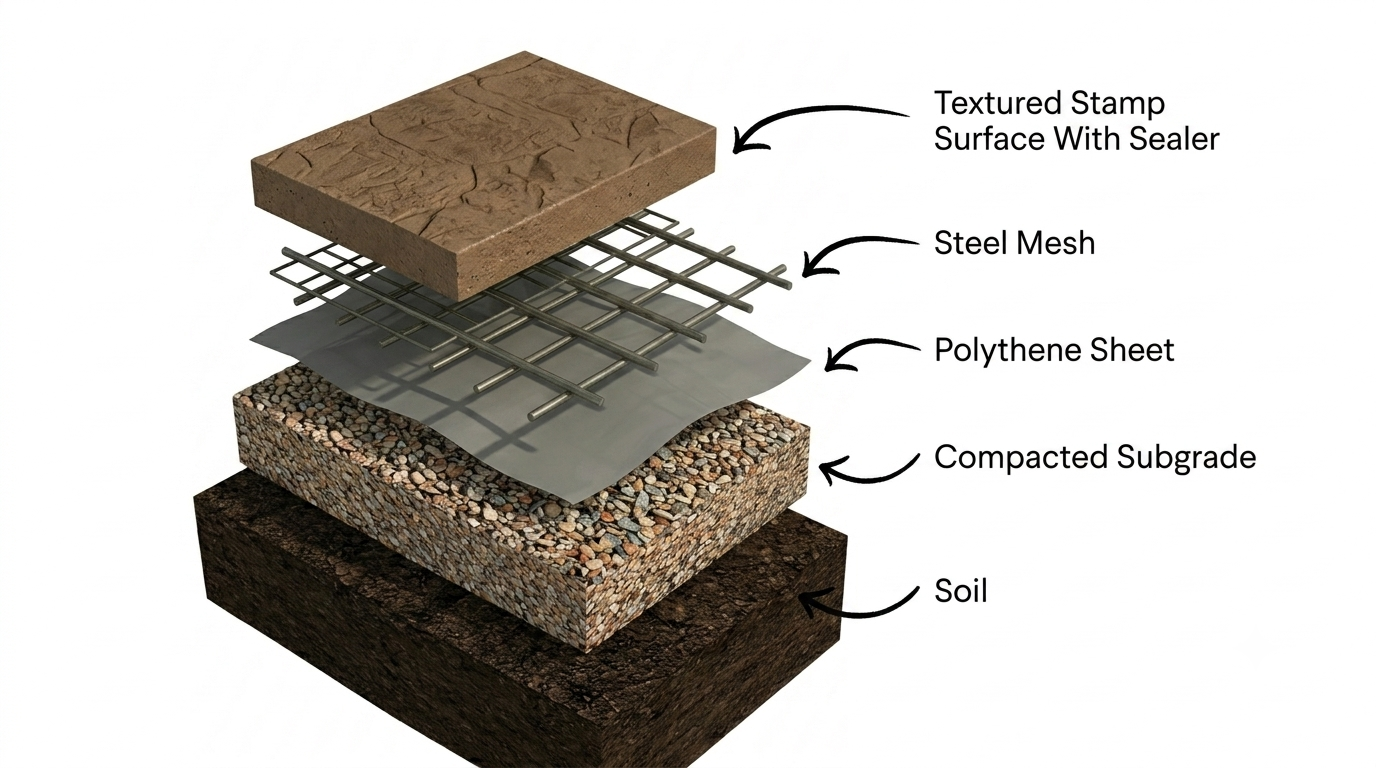
Stamped concrete in Dubaiis a durable and attractive surface solution designed to withstand everyday use and demanding UAE conditions. Understanding stamped concrete layers is important if you want a durable, attractive surface that stands up to everyday use and UAE conditions. What you see on the surface is only part of the installation—several carefully prepared layers underneath help support the finished stamped concrete.
At Good Hand Stones and Concrete Flooring, we’ve installed stamped concrete in Dubai across villas and commercial properties, and one thing is always true: a stunning finish is only as good as the foundation beneath it. Here’s a breakdown of every layer that goes into a properly built stamped concrete surface, from the ground up.
These stamped concrete layers work together to create a strong and durable finished surface.
Everything starts with the native soil. Before any construction begins, the existing ground is assessed for stability, drainage, and load-bearing capacity. In the UAE, soil conditions can vary significantly depending on the site — sandy, loose, or expansive soils all behave differently under load. Skipping proper soil assessment is one of the most common reasons decorative concrete surfaces crack or sink over time.
On top of the natural soil, a layer of compacted aggregate (crushed stone or gravel) is laid and mechanically compacted. This sub-grade layer does two critical jobs: it creates a stable, even base for everything above it, and it improves drainage so water doesn’t pool beneath the slab. A poorly compacted sub-grade is one of the leading causes of uneven settling and surface cracking down the line — no amount of surface sealing can fix a problem that starts here.
A polythene sheet is placed over the compacted sub-grade before concrete is poured. This acts as a moisture barrier, preventing ground moisture from migrating up into the concrete slab. For pool decks, villa driveways, and outdoor patios in the UAE’s climate, controlling moisture transfer is essential — it helps prevent efflorescence (that chalky white staining), reduces the risk of surface blistering, and protects the long-term integrity of the finish.
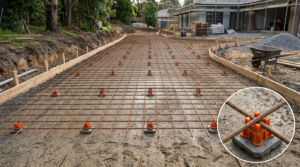
Concrete is strong under compression but weak under tension, which is where steel mesh reinforcement comes in. A grid of steel rebar or mesh is laid within the slab to give it tensile strength, helping the concrete resist cracking from ground movement, thermal expansion, and everyday loads — whether that’s vehicle traffic on a driveway or foot traffic around a pool. This layer is completely invisible in the finished product, but it’s what keeps a stamped concrete surface structurally sound for years.
Finally, the layer everyone sees: the concrete is poured, color is integrated (through integral color, color hardener, or a combination of both), and while it’s still workable, stamping mats are pressed into the surface to create the desired texture — whether that’s natural stone, wood plank, cobblestone, or a custom pattern. Once cured, a high-quality sealer is applied to protect the surface from UV exposure, moisture, and wear, while also enhancing the color and giving it that polished, finished look.Understanding these stamped concrete layers can help you make better decisions when planning a new driveway, patio, pool deck, or other concrete surface.
A lot of the visual difference between stamped concrete installations comes down to color choice and stamp pattern — but the difference in how long it lasts comes down to the four layers you never see. When you’re evaluating a decorative concrete contractor, it’s worth asking:
A contractor who can answer these questions in detail is one who understands that stamped concrete is a system, not just a surface finish.
At Good Hand Stones and Concrete Flooring, every stamped concrete project — whether it’s a villa driveway, a pool deck, or a commercial courtyard — starts with proper sub-grade preparation and moisture protection, is reinforced for long-term durability, and finishes with expert stamping, coloring, and sealing tailored to Dubai and Abu Dhabi’s climate.
If you’re planning a stamped concrete project and want it done right from the soil up, get in touch with our team for a consultation
Follow us on Instagram @Goodhandscf for daily project updates, or visit our showroom on Salah Al Din Street, Dubai to see all three finishes in person.
Explore Our Interior Design Division: Click Here
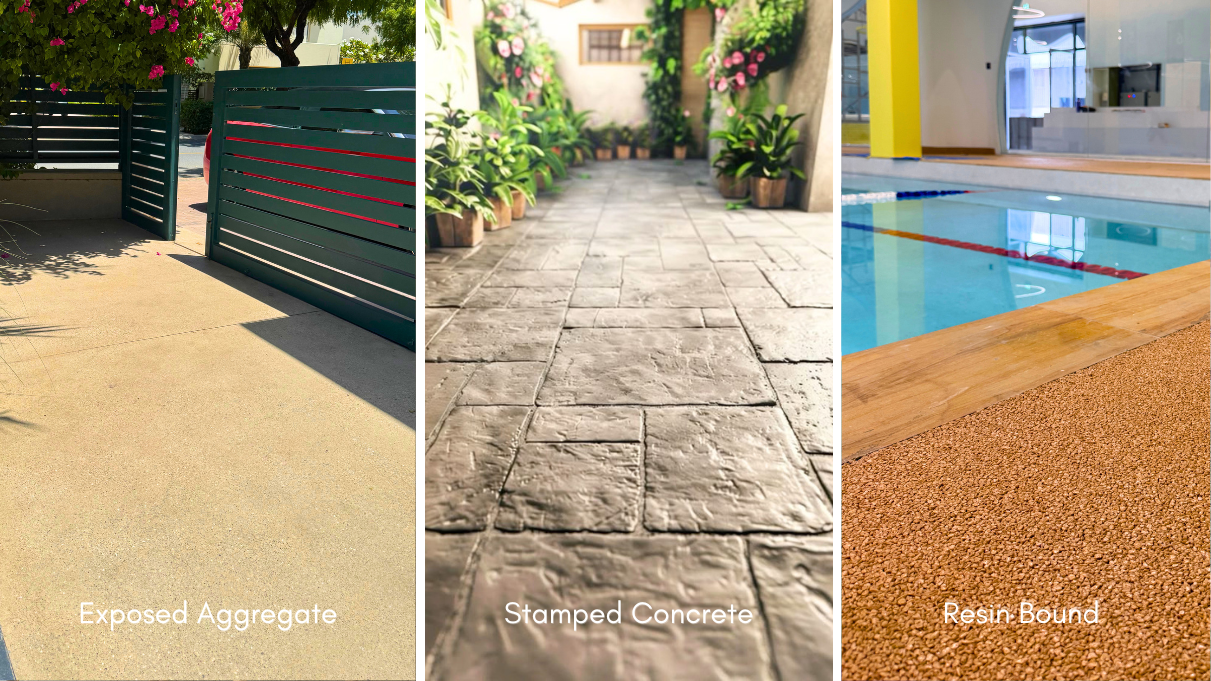
By July, surface temperatures on UAE driveways, terraces, and pool decks can climb well past what’s comfortable to walk on barefoot. If you’re planning an outdoor renovation this summer, the flooring material you choose isn’t just a design decision — it directly affects comfort, safety, and how long the surface lasts under Dubai’s extreme heat and UV exposure.
At Good Hand Stones & Concrete Flooring LLC, we get the same question from villa owners and developers every summer: “Which outdoor flooring stays cool, doesn’t crack, and still looks good after five UAE summers?” Here’s an honest, side-by-side comparison of the three most popular options — exposed aggregate, stamped concrete, and resin bound surfacing — so you can choose with confidence.
Outdoor surfaces in the UAE face a punishing combination of factors:
A flooring system that isn’t engineered for this climate will show cracking, fading, or heat-retention problems within a couple of summers. That’s why material selection matters more here than in almost any other market.
Exposed aggregate exposes the natural stone within the concrete mix, creating a textured, slip-resistant, and naturally cooler surface underfoot compared to smooth finishes.
Best for: driveways, pool surrounds, garden paths, villa entrances
Pros:
Considerations:
Explore our full Exposed Aggregate range and finishes.
Stamped concrete replicates the look of natural stone, brick, or tile at a fraction of the cost and installation time, making it a favorite for large driveways and courtyards across the UAE.
Best for: driveways, courtyards, large patios, commercial walkways
Pros:
Considerations:
See patterns and color options on our Stamped Concrete page.
Resin bound flooring uses natural aggregates bound with a UV-stable resin, poured to create a smooth, permeable, seamless surface. It has grown rapidly in popularity across UAE gardens and pool decks over the past two years.
Best for: pool decks, rooftop terraces, garden paths, balconies
Pros:
Considerations:
Learn more about the process on our Resin Bound service page.
If your priority is a pool deck or terrace, resin bound or exposed aggregate will keep the surface noticeably cooler and safer underfoot than a standard sealed concrete or tile finish. For driveways and large courtyards, exposed aggregate offers the best long-term durability against UAE heat cycles, while stamped concrete remains the most cost-effective option if you choose lighter, heat-reflective color tones.
Follow us on Instagram @Goodhandscf for daily project updates, or visit our showroom on Salah Al Din Street, Dubai to see all three finishes in person.
Explore Our Interior Design Division: Click Here
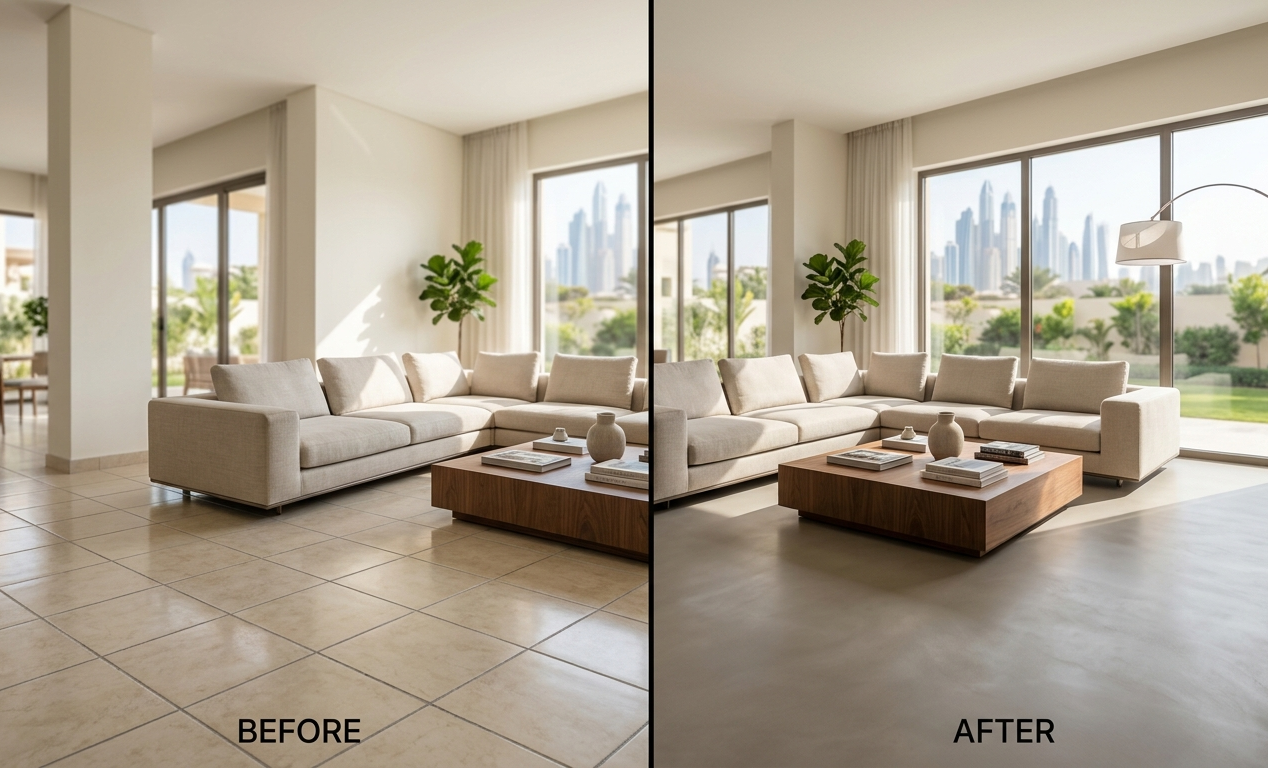
For decades, ceramic and porcelain tiles have been the default choice for floors, walls, patios, and bathrooms across the UAE. While tiles continue to serve their purpose, a growing number of architects, interior designers, and villa owners are now turning to a more modern alternative: microtopping.
From luxury villas in Dubai to contemporary commercial spaces in Abu Dhabi, microtopping is becoming one of the fastest-growing decorative surface solutions in the construction and renovation industry. Its seamless appearance, modern aesthetic, and practical performance make it an ideal fit for the region’s evolving design preferences.
But what exactly is driving this shift?
Modern architecture has moved away from heavily segmented surfaces. Homeowners today prefer open, flowing spaces where floors, walls, and outdoor areas feel visually connected.
Traditional tiles introduce grout lines every few inches, creating visual interruptions that can make spaces appear smaller and busier. Microtopping, on the other hand, creates a continuous surface with minimal joints, producing a clean and sophisticated appearance.
This seamless finish is one of the main reasons designers frequently specify microtopping for:
The result is a surface that feels contemporary, elegant, and timeless.
One of the biggest challenges in renovation projects is demolition.
Removing existing tiles often means:
Microtopping can typically be applied directly over properly prepared existing tile surfaces. This dramatically reduces renovation time and allows homeowners to transform spaces without extensive reconstruction.
For UAE property owners looking to upgrade their homes while minimizing disruption, this is a significant advantage.
Minimalist and industrial-inspired interiors continue to dominate luxury design trends across Dubai and the UAE.
Microtopping complements these styles perfectly because it offers:
Whether paired with natural stone, wood, glass, or metal accents, microtopping provides a versatile backdrop that enhances modern architectural elements.
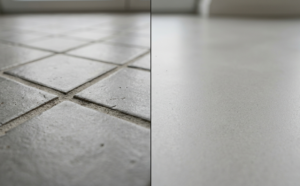
Unlike many finishing materials that are limited to specific environments, microtopping can be used across multiple areas of a property.
Common applications include:
Grout joints are often one of the most difficult aspects of tile maintenance.
Over time, grout can:
Because microtopping significantly reduces visible joints, cleaning becomes simpler and surfaces maintain a cleaner, more uniform appearance.
For busy homeowners, this translates into less maintenance effort and a more polished look year-round.
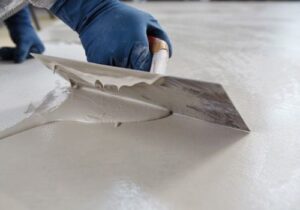
Property upgrades are increasingly focused on both aesthetics and value.
Modern buyers and tenants are attracted to finishes that feel premium, contemporary, and professionally executed. Microtopping helps achieve this by creating surfaces that stand out from conventional tile installations.
As villa renovation activity continues to grow across Dubai, many property owners view microtopping as a strategic upgrade that improves both appearance and long-term market appeal.
Although microtopping delivers exceptional results, achieving a flawless finish requires specialist knowledge and precise application techniques.
Successful installation depends on:
Experienced contractors ensure that the finished surface performs as intended while maintaining its visual appeal for years to come.
The UAE construction market continues to embrace innovation, sustainability, and contemporary design. As these priorities shape future developments, microtopping is increasingly becoming the preferred alternative to traditional surface materials.
Its ability to combine modern aesthetics, renovation efficiency, durability, and versatility makes it one of the most compelling finishing solutions available today.
For homeowners seeking a seamless, modern, and long-lasting surface, microtopping is no longer an emerging trend—it is rapidly becoming the new standard in premium residential and commercial design.
With the growing popularity of seamless architectural finishes, Good Hand Stones and Concrete Flooring LLC has established itself as a trusted specialist in decorative concrete and surface enhancement solutions. The company provides professional microtopping applications for residential, commercial, hospitality, and outdoor projects throughout the UAE. In addition to microtopping, their expertise extends to stamped concrete, exposed aggregate, concrete polishing, brick cladding, and customized decorative surface treatments. By combining technical knowledge with quality craftsmanship, Good Hand helps clients achieve surfaces that are both visually appealing and built to withstand the region’s demanding environmental conditions.
Explore Our Interior Design Division: Click Here
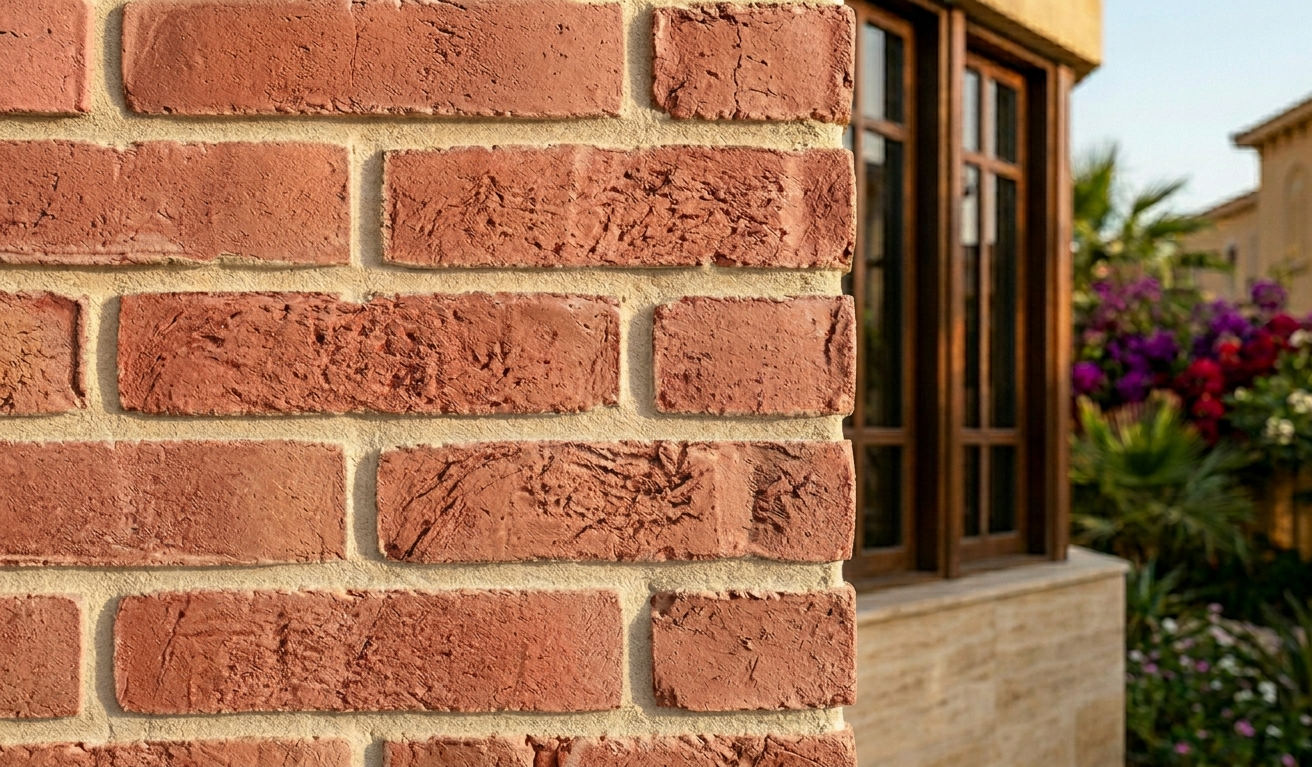
The UAE construction industry is evolving fast. Developers and homeowners are no longer just asking “does it look good?” — they’re asking “will it last?”
As villa projects and premium residential developments continue to grow across Dubai and beyond, there’s a clear shift happening: people want surfaces that are beautiful and built to endure.
Not long ago, cladding and surface treatments were considered finishing touches — the last thing added before handover. Today, that thinking has changed completely.
Materials are now chosen based on:
In short, how a surface looks on day one matters less than how it holds up on year ten.
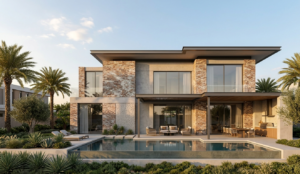
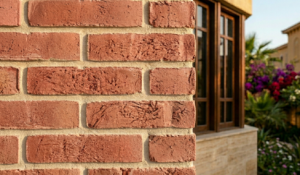
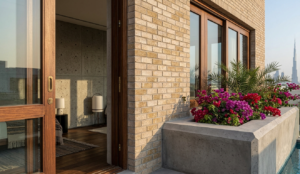
Among the many materials available today, antique brick cladding continues to stand out. It brings a timeless, classic character to any structure — but don’t let the traditional look fool you. Modern brick cladding also acts as a protective layer, shielding walls from weathering
and reducing long-term maintenance costs.
It’s one of those rare materials that gets better with age, both visually and functionally.
Experienced contractors and developers are paying closer attention to the finer details of execution — things like:
This shift reflects a more professional, strategic approach to construction. A project isn’t considered successful just because it looks great at handover. It’s successful when the finish still looks great five years later.
This is exactly where Good Hand Stones and Concrete Flooring LLC makes a difference.
Specializing in high-performance surface solutions, Good Hand brings together skilled craftsmanship and quality materials to deliver results that stand the test of time. Their range of services includes:
Whether it’s a luxury villa, a commercial fit-out, or a large-scale residential project, Good Hand delivers surfaces that perform as well as they look.
As construction activity across the UAE continues to expand, the need for skilled, reliable surface specialists will only increase. For developers, villa owners, and project managers — choosing the right materials and the right team from the start is what separates a good project from a great one.
Good Hand Stones and Concrete Flooring LLC is your one-stop solution for surface excellence — combining technical expertise, quality materials, and precise execution on every project.
Ready to elevate your next project? Get in touch with Good Hand today.
Explore Our Interior Design Division: Click Here
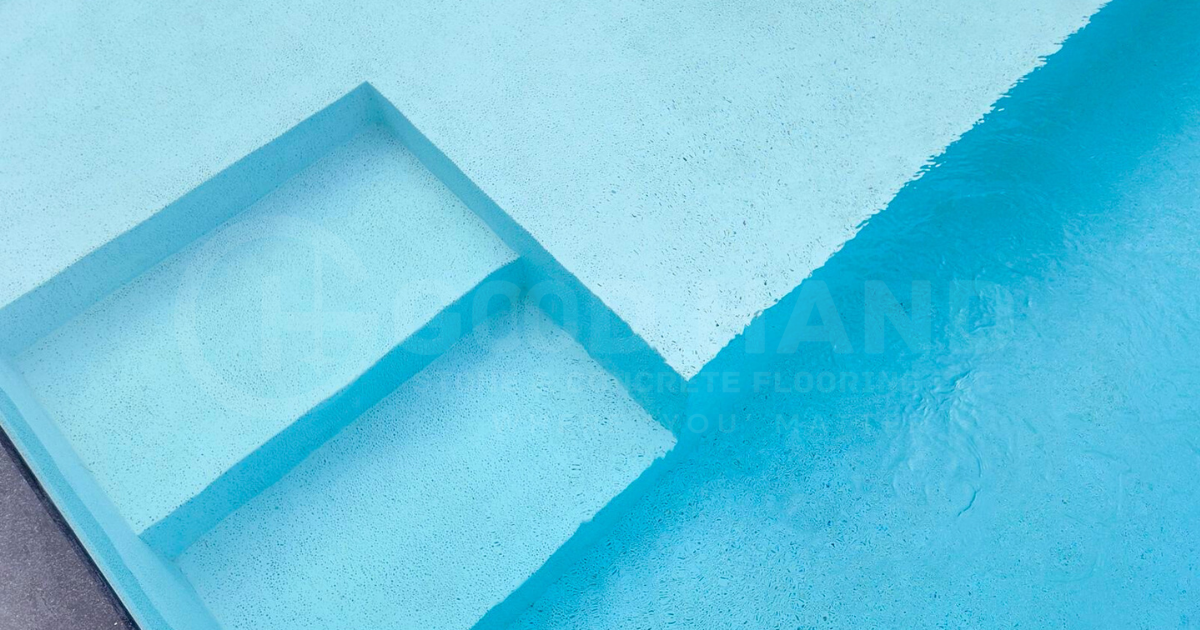
When designing or renovating a swimming pool, choosing the right interior finish is one of the most important decisions for long-term performance and durability. Two of the most common options are pool render and pool tiles. While both provide a functional and aesthetic finish, their durability, maintenance, and cost implications differ significantly.
For villa owners, property developers, and contractors in regions like the UAE where pools are exposed to extreme temperatures, understanding which option lasts longer is essential. This guide explores the key differences between pool render and tiles to help you determine the best finish for long-term durability.
Pool render is a cementitious or polymer-modified coating applied directly to the concrete shell of a swimming pool. It creates a smooth, waterproof base layer that prepares the pool for final finishing such as paint, quartz coating, or pebble finishes.
A high-quality pool render system includes:
Modern render systems are designed to withstand water pressure, chemical exposure, and temperature fluctuations, making them highly durable when applied professionally.
Pool tiles are ceramic, porcelain, or glass tiles installed over a rendered base using waterproof adhesives and grout. They are widely used for decorative purposes and are often chosen for luxury or aesthetic-focused projects.
Tiles offer:
However, tile installations require multiple layers including render, adhesive, tile fixing, and grout sealing, making the system more complex.
Pool Render:
A professionally applied pool render becomes part of the pool structure. It bonds directly to the concrete shell, creating a strong and unified surface. Modern polymer-modified renders offer flexibility, which helps prevent cracking due to structural movement or temperature changes.
Tiles:
Tiles are fixed on top of a rendered base using adhesive and grout. While tiles themselves can be strong, they rely heavily on the quality of installation. Any movement in the pool structure may cause tiles or grout lines to crack or detach over time.
Winner for durability: Pool render
It integrates with the structure and has fewer failure points.
In regions like Dubai and across the UAE, swimming pools face extreme heat, UV exposure, and temperature fluctuations.
Pool Render:
High-quality pool render systems are designed to handle thermal expansion and contraction. They resist cracking when properly cured and coated with waterproof sealers.
Tiles:
Tiles exposed to intense heat can expand and contract. Over time, this can weaken grout lines and adhesive layers, leading to tile popping or loosening — a common issue in outdoor pools.
Winner for durability: Pool render
It performs better under extreme weather conditions with less risk of surface failure.
Waterproofing is critical to prevent leakage and structural damage.
Pool Render:
Waterproof pool render systems act as a protective barrier that prevents water seepage. Advanced render systems include waterproof additives and sealers, ensuring long-term protection.
Tiles:
Tiles themselves are water-resistant but not fully waterproof. Water can penetrate through grout lines and joints if not properly sealed or maintained. Over time, this can cause hidden leakage and damage beneath the tile surface.
Winner for durability: Pool render
It provides more reliable and consistent waterproofing.
Pool Render:
Pool render surfaces require minimal maintenance when sealed properly. If minor cracks or wear occur, repairs can be done by patching and re-coating specific areas without major disruption.
Tiles:
Tiles require regular inspection of grout lines and joints. Damaged tiles must be individually removed and replaced, which can be time-consuming and costly. Grout discoloration and algae buildup also require periodic cleaning.
Winner for durability and ease: Pool render
It is easier and more cost-effective to maintain over time.
A well-installed pool finish should last for many years without major repairs.
Pool Render:
A high-quality pool render system can last 10–15 years or more with proper coating and maintenance. Re-coating the surface periodically can extend its lifespan significantly.
Tiles:
Tile finishes can also last long if maintained properly, but grout and adhesive layers typically require repairs every few years. In harsh climates, tile replacement may be needed sooner.
Winner for long-term durability: Pool render
It generally offers longer uninterrupted performance.
Initial Cost:
Tiles are usually more expensive due to material and labor costs. Premium tiles and installation can significantly increase project budgets.
Pool render systems are more cost-effective initially.
Long-Term Cost:
Tile repairs, regrouting, and replacements increase long-term maintenance costs.
Pool render systems require less frequent repairs and are more economical over time.
Best value: Pool render
It offers better long-term return on investment.
Despite the durability advantages, tiles may still be chosen for specific reasons:
In many modern pools, tiles are used selectively while the main pool surface uses pool render or quartz finishes for durability.
The decision between pool render and tiles should be based on:
For residential villas and outdoor pools in the UAE, a professional waterproof pool render system is often the most durable and cost-effective solution. It ensures structural protection, minimizes leakage risks, and withstands harsh environmental conditions.
Both pool render and tiles have their advantages, but when it comes to long-term durability, pool render clearly stands out. It provides superior waterproofing, structural bonding, and resistance to extreme weather conditions while requiring less maintenance over time.
Tiles offer aesthetic appeal and design flexibility, but they come with higher maintenance and repair risks, especially in outdoor environments.
For property owners and developers seeking a long-lasting, reliable, and cost-effective pool finish, investing in a high-quality pool render system installed by professionals is the smarter choice. A well-rendered pool not only enhances durability but also ensures a safe, leak-free, and visually appealing swimming environment for years to come.
Explore Our Interior Design Division: Click Here
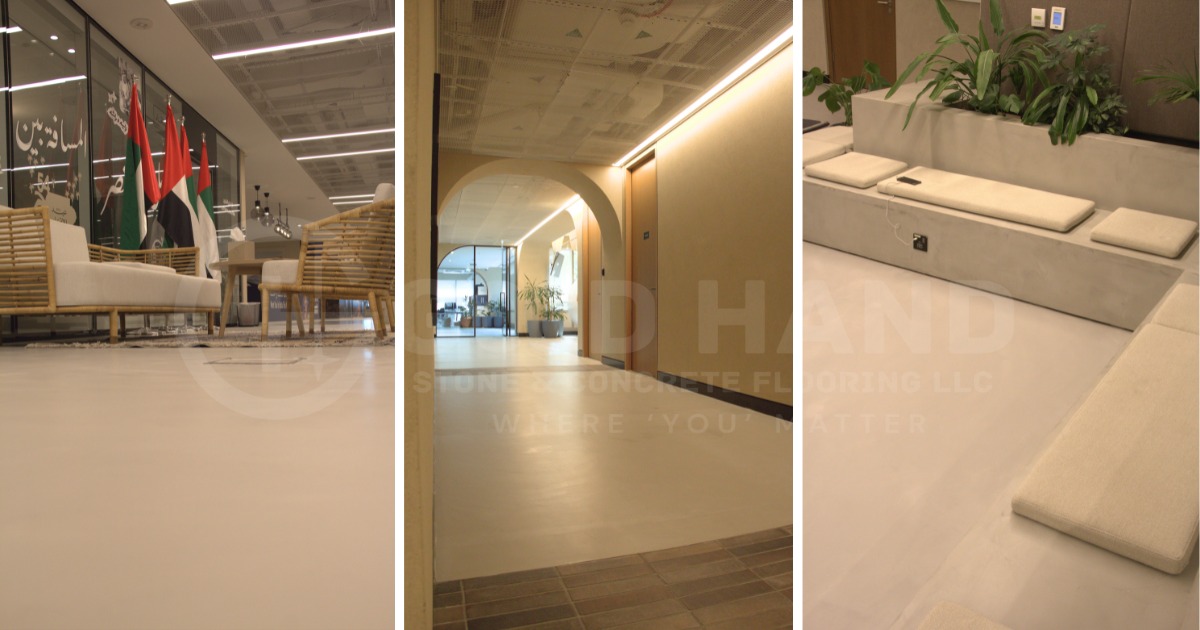
Dubai, UAE — In modern architecture, the most effective interiors are those that feel calm, cohesive, and purposeful. Every design choice—from materials to finishes—shapes how a space is experienced. In the Dubai Media Office, this philosophy came to life through the use of microcement, a seamless and versatile material that elevated the office environment while enhancing functionality and aesthetics.
Microcement is a thin, cement-based coating that can be applied over floors, walls, and stairs without visible joints. Its seamless application allows interiors to feel larger, cleaner, and visually uninterrupted, providing a perfect balance between elegance and practicality.
At the Government of Dubai Media Office, microcement or microtopping was applied to create a sense of flow and cohesion throughout key areas. From the moment visitors step inside, the continuous surfaces guide the eye naturally, allowing the architecture to speak for itself.
The seamless floors and walls not only enhance visual clarity, but also contribute to a professional and sophisticated atmosphere. The material’s subtle texture adds depth and tactility, creating spaces that are welcoming without sacrificing modernity or authority.
Every detail of the design was carefully considered, with microcement playing a crucial role in:
The result is a workspace that reflects the forward-thinking identity of the Dubai Media Office, combining elegance, efficiency, and modern design in perfect harmony.
Microcement is more than just a finish—it is a strategic design tool for institutional interiors. Its seamless nature:
In the Government of Dubai Media Office, these qualities allowed the design to deliver a timeless, professional, and cohesive environment—one that communicates authority and modernity while remaining welcoming for employees and visitors alike.
As government and corporate interiors evolve, seamless finishes like microcement are becoming essential for creating spaces that are both functional and aesthetically refined. The Government of Dubai Media Office demonstrates how thoughtful design and material choice can elevate institutional spaces, setting a benchmark for elegance, clarity, and modern architectural expression.
Also Read More: The Best Areas to Use Microcement Flooring: Indoors and Outdoors
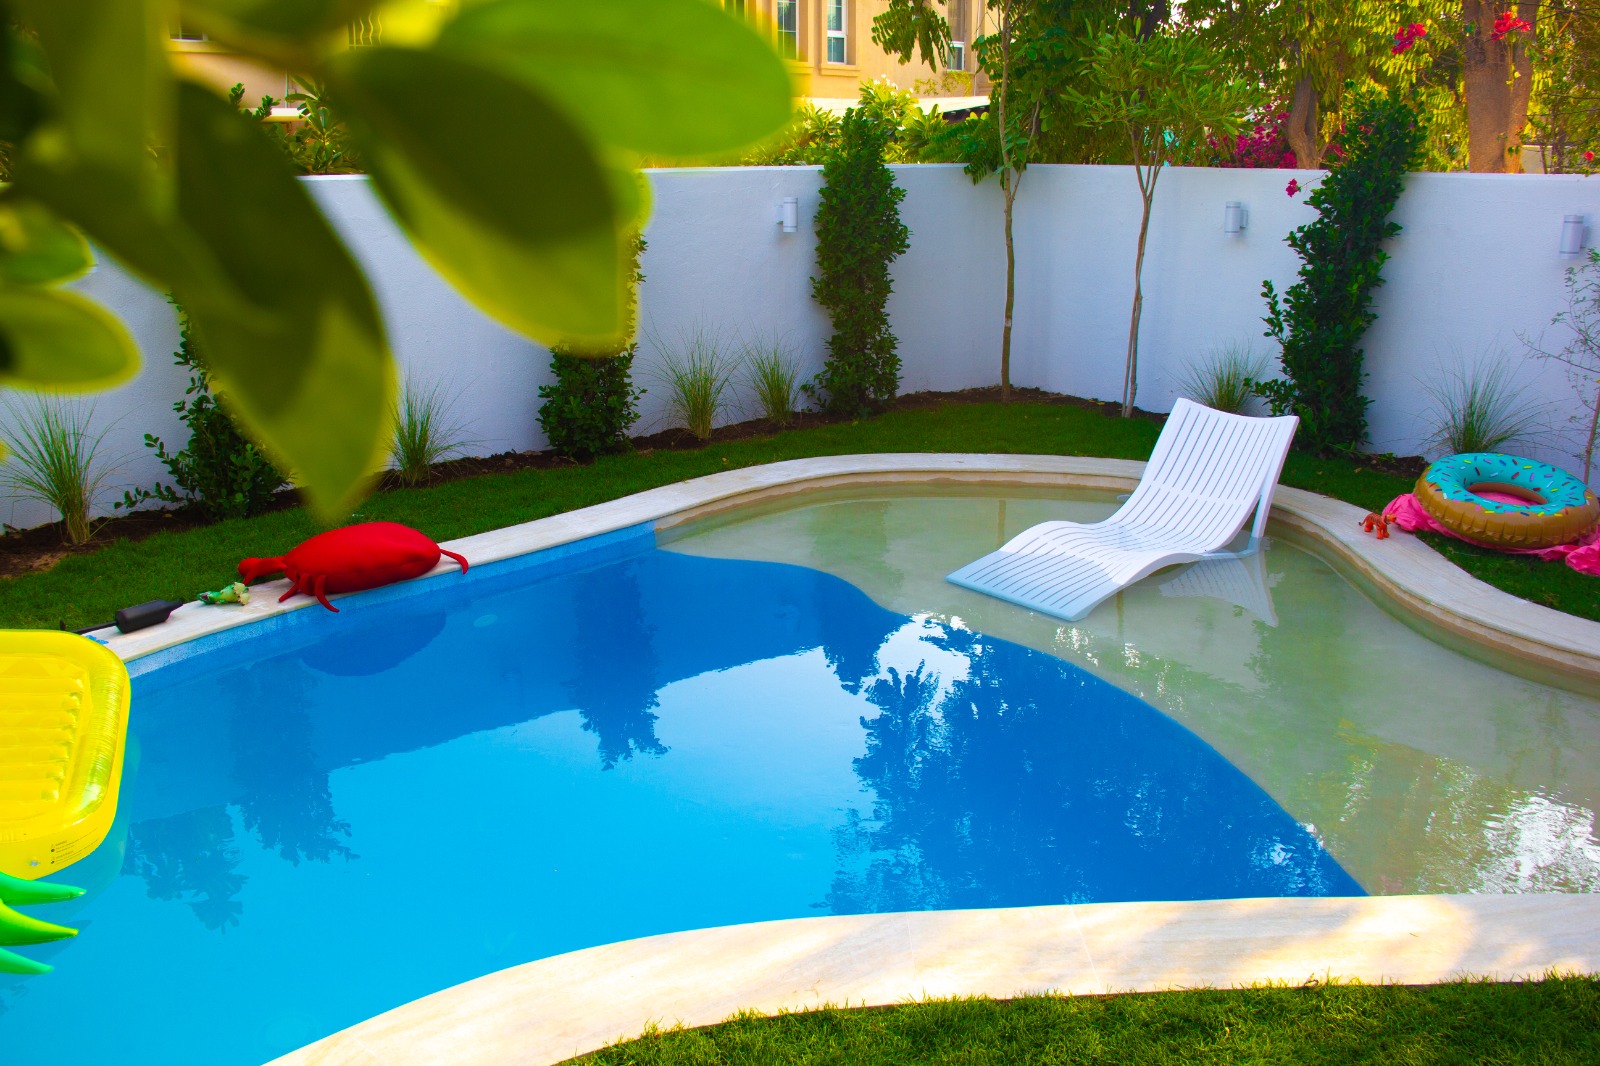
At Good Hand Stones & Concrete Flooring LLC, we believe that every project is an opportunity to combine thoughtful design with exceptional craftsmanship. Our latest work at a beautiful villa in Emirates Hills is a perfect example—a kid’s pool completely refreshed using our in-house Render System, finished in two distinct colors that elevate both style and functionality.
Not only does the pool now look visually striking, but our skilled team also completed the entire project ahead of schedule, showcasing the efficiency, precision, and experience behind our work.

Our custom Render System is specially developed for outdoor applications, wet areas, and pool surfaces. It provides a modern, seamless finish that enhances the overall look of the pool while delivering long-term durability—an ideal choice for luxury residential spaces.
With every project, we focus on achieving:
Since this pool was designed for children, it was essential to use a surface that is safe, long-lasting, and visually appealing. Our render system ensures all three.
This particular pool includes a shallow lounge / tanning ledge and a deeper main swimming area, so we created a dual-tone design that highlights each space while maintaining harmony.
For the shallow area, we applied a soft warm beige tone. This color beautifully complements the surrounding greenery and outdoor flooring, creating a soothing and resort-like feel.
It creates the perfect space for:
The subtle beige also enhances the natural look of the pool, keeping it classy and understated.
For the deeper part of the kid’s pool, we used a fresh aqua blue shade. This color reflects brilliantly through the water, making the pool look:
Blue tones are especially popular for kid’s pools because they improve visibility, add energy, and create a cool, refreshing ambiance. The two colors together transform the pool into a visually appealing, well-defined space.
While materials are important, what truly sets this project apart is the high level of craftsmanship our team delivered on site. Every layer of the render system was applied with precision—ensuring a smooth surface, consistent texture, and flawless blending of both colors.
Our skilled craftsmen:
And most importantly, the entire job was completed ahead of time, thanks to our team’s commitment and expertise. Timely delivery without compromising on quality is something we take immense pride in.
Here are some reasons why homeowners across Dubai choose our render system for pools and wet areas:
Ideal for kid’s pools, tanning ledges, and shallow play zones.
A clean finish without grout lines, joints, or tile gaps.
Engineered to withstand sun exposure, water pressure, and weather conditions.
Choose from soft tones, bright blues, naturals, earthy shades, or fully customized palettes.
Easy to clean, resistant to discoloration, and long-lasting.
Transforms old pool surfaces into a fresh, modern design.
The completed kid’s pool now reflects a balance of beauty, safety, and thoughtful design. The dual-tone render adds depth and character, while the seamless finish gives the entire space a modern, luxurious feel. Parents get a relaxing lounge area, kids get a fun, refreshing swimming zone, and the villa gets a stunning visual enhancement—delivered before the expected handover date.
Whether you want to renovate an existing pool or create a custom outdoor flooring solution, our team can guide you through color options, textures, and design ideas.
We specialize in:
📍 Project: Kid’s Pool, Emirates Hills
🎨 Finish: Dual-Tone In-House Render System
🛠️ Execution: Completed Ahead of Time
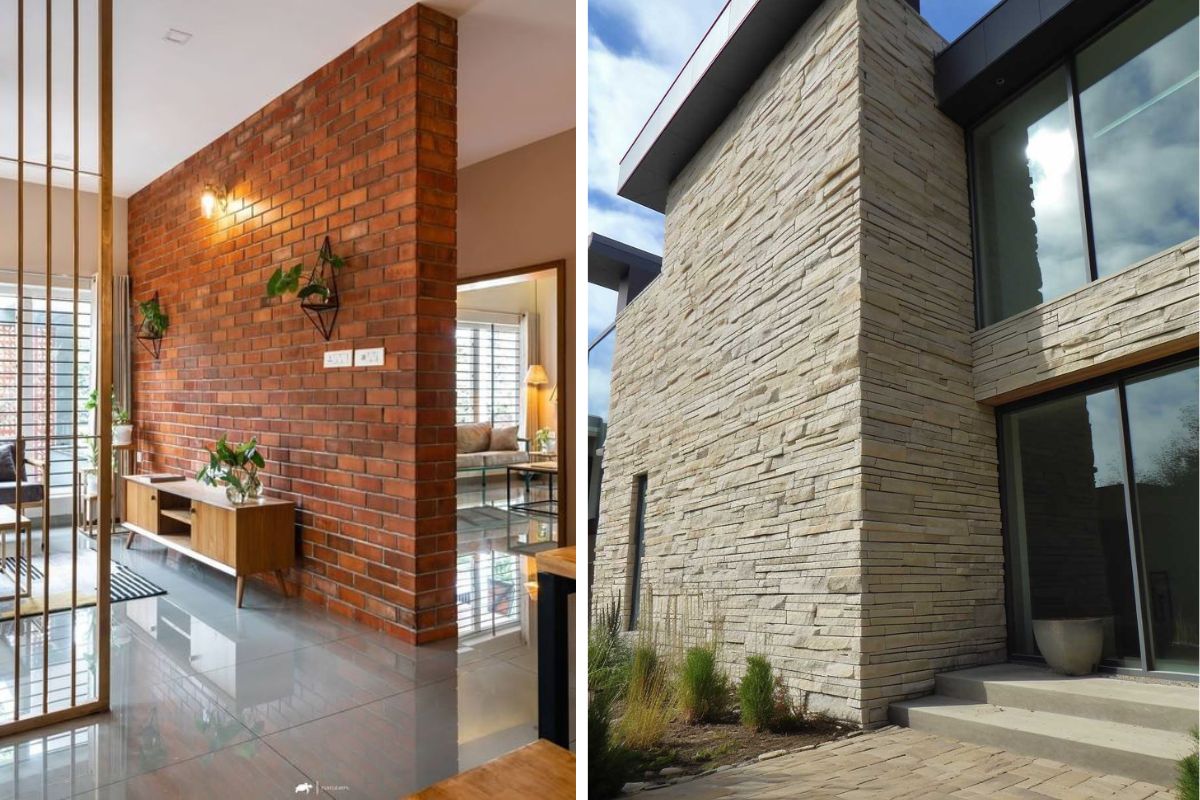
If you’re looking to transform your interiors or exteriors, few solutions combine beauty, durability, and practicality as seamlessly as wall cladding and artificial stone cladding. At Good Hand Stones and Concrete Flooring, we specialize in these premium finishes, helping homeowners and businesses design spaces that are visually striking and built to last.

Wall cladding is the process of covering a wall with an extra layer of material to provide protection, insulation, and enhanced aesthetics. Instead of leaving walls plain or painted, cladding adds texture, depth, and durability. It can be applied to both interior and exterior walls, offering a stylish finish while safeguarding the surface underneath from moisture, cracks, and environmental damage. Depending on the material used — such as artificial stone, wood, or composite finishes — wall cladding can dramatically change the look and feel of any space, making it more modern, elegant, and long-lasting.
Wall cladding is more than just a decorative feature — it’s a long-term investment in your property’s durability and style. By applying a protective layer over walls, cladding shields surfaces from weather damage, moisture, and everyday wear while adding a unique, textured look.
Whether it’s for your living room, office, or outdoor façade, wall cladding offers the perfect blend of style and practicality.
Among the different types of wall cladding, artificial stone cladding stands out as one of the most versatile and cost-effective options. Unlike natural stone, which is heavy and expensive, artificial stone cladding provides the same elegant look at a fraction of the cost — with added advantages in installation and durability.
At Good Hand Stones and Concrete Flooring, our artificial stone cladding solutions are crafted with precision to enhance both beauty and strength, ensuring your walls remain timeless and functional.
At Good Hand Stones and Concrete Flooring, we are committed to providing top-quality wall cladding and artificial stone cladding that combine aesthetics, durability, and value.
Whether you’re looking to revamp your interiors with feature walls or upgrade your exterior façade, artificial stone cladding and wall cladding are the perfect solutions for combining elegance, strength, and affordability.
At Good Hand Stones and Concrete Flooring, we bring your vision to life with innovative finishes and expert craftsmanship.
Visit our showroom today and explore our wide range of wall cladding and artificial stone cladding options. Let us help you create spaces that truly stand out
Also Read More: Transform Your Space with Expert Interior Design Services in the UAE
Microcement flooring has quickly become a sought-after solution in both residential and commercial design due to its durability, minimalist aesthetics, and flexibility. This cement-based coating goes on seamlessly and can be used on almost any surface, including walls, floors, furniture, and even ceilings. This makes it ideal for a lot of indoor and outdoor uses. In this article, we’ll explore the best areas to use microcement, along with why it’s a top choice for designers, architects, and homeowners alike.
In this article, we’ll explore the best areas to use microcement, along with why it’s a top choice for designers, architects, and homeowners alike. Before we get into the details of where microcement flooring works best, let’s take a quick look at why this material is becoming so popular in modern design:
Indoor Applications of Microcement:
Microcement flooring and wall finishes are very popular in bathrooms. Here’s why:
Perfect for: floors, walls, countertops, niches, bathtubs, and shower trays.
Microcement flooring is perfect for modern, minimalist kitchen designs.
Ideal uses: Kitchen flooring, splashbacks, countertops, and even kitchen islands.
Create a continuous visual flow in open-plan living spaces using microcement flooring.
Ideal uses: Living room floors, TV walls, and accent areas.
Microcement Flooring may not be the first material that comes to mind for bedrooms—but its smooth, matte texture creates a warm, inviting ambiance.
Ideal uses: Bedroom flooring, headboard walls, and dressing table tops.
These areas often suffer from wear and tear, making microcement a practical choice.
Ideal uses: Staircases, landings, corridors, and entryways.
Outdoor Applications of Microcement
The adaptability of microcement in outdoor settings is among its most remarkable features. It can endure harsh weather conditions without losing its style thanks to its textured grip and weather-resistant finishes.
Outdoor living is all about creating comfortable, durable spaces. Microcement fits perfectly into that vision.
Ideal uses: Patios, terraces, balcony floors, and wall cladding.
Pool decks require materials that can handle water exposure and heavy use. Microcement delivers on both fronts.
Ideal uses: Pool borders, surrounding walkways, sun loungers, and outdoor showers.
Take outdoor entertaining to the next level with custom microcement surfaces.
Ideal uses: Worktops, benches, dining tables, firepits, and built-in BBQ units.
From spa-like bathrooms to rugged outdoor kitchens, microcement flooring adapts to virtually any surface—offering a seamless blend of design and function. Whether you’re renovating a private villa, upgrading a retail space, or designing a hospitality project, microcement offers timeless appeal with modern performance.
| Area | Why Microcement Works |
|---|---|
| Bathrooms | Waterproof, mold-resistant, seamless, and easy to clean |
| Kitchens | Durable, hygienic, modern aesthetic |
| Living Rooms | Sleek, continuous surface, great for high traffic |
| Bedrooms | Warm appearance, works with underfloor heating |
| Stairs & Hallways | Impact-resistant, slip-resistant, cohesive flow |
| Terraces & Patios | UV and weather resistant, safe, and stylish |
| Pool Surrounds | Chlorine-tolerant, non-slip, long-lasting |
| Outdoor Kitchens | Heat and weather resistant, stylish and customizable |
At Good Hand Stones and Concrete Flooring, we combine craftsmanship, quality, and innovation to deliver flooring and surface solutions that stand the test of time. Whether it’s exposed aggregate, stamped concrete, interlock fixing, microtopping/microcement, or brick cladding, our team is dedicated to transforming outdoor and indoor spaces with precision and aesthetic excellence. With years of experience across residential, commercial, and hospitality projects, we pride ourselves on timely execution, attention to detail, and client satisfaction. Choose us for surfaces that are not only durable and functional but also thoughtfully designed to elevate your space.
Because of its eco-friendly qualities, durability, and appealing appearance, resin-bound surfacing has become incredibly popular in recent years. Clear resin and natural aggregates are combined to create this seamless finish, which is then applied to a solid base. The end effect is a permeable, smooth surface that is perfect for patios, driveways, walkways, and even areas by pools.
However, how is this smooth surface installed? To help you recognize the craftsmanship and understand why it’s such a reliable option, we’ve broken down the resin bound installation process into comprehensive, step-by-step steps in this blog.
Step 1: Planning, Survey, and Site Visit
A thorough site assessment is the first step. A qualified group comes to the site to:
In order to select aggregate colors, choose patterns or borders, and address any particular design or usage issues, this step also entails talks with the client. A perfect finish is guaranteed and expensive revisions are avoided with careful planning.
Step 2: Selecting the Proper Base
The strength of the base has a significant impact on how long resin-bound surfacing lasts. It is essential to have a solid, crack-free foundation. Appropriate bases consist of:
Step 3: Edging Installation
In order to contain the resin-bound mixture and define the working area, edging is necessary. Typical edging materials consist of:
Step 4: Priming and Surface Cleaning
Strong adherence between the resin and base is ensured by a clean surface. Among the steps in the preparation process are:
Step 5: Combining the Aggregates and Resin
A two-part polyurethane resin is combined with dried, dust-free natural stone aggregates in a forced action mixer to create resin-bound surfacing. Important actions consist of:
Accurately weighing the aggregates to preserve uniformity in texture and color
adding the resin and stirring for a predetermined amount of time (usually three to five minutes).
If necessary, applying pigments or anti-slip additives
Strength and appearance are guaranteed to be consistent in a well-mixed batch. Weak spots or uneven color can result from poor mixing.
Step 6: Trowelling and Hand-Laying
The prepared surface is immediately covered with a mixture of aggregate and resin:
Depending on usage, it should be laid at a depth of 15–20 mm and spread evenly with a shovel (15 mm for foot traffic, 18–20 mm for vehicles).
compacted and smoothed in a circular motion using a steel float
Carefully finished edges and joints prevent visible seams.
Since the resin starts to cure within 20 to 30 minutes of mixing, this step calls for dexterity and skill.
Step 7: Applying the optional anti-slip finish
Before curing, anti-slip materials such as crushed glass or aluminum oxide are lightly broadcast onto the surface in areas that are prone to moisture or where additional traction is required. This is particularly helpful for:
It enhances safety without compromising the aesthetic finish.
Step 8: Protection and Curing
The resin-bound surface needs to be left undisturbed to cure after it has been laid:
After six to eight hours, foot traffic can resume.
automobiles after 24 to 48 hours
During this time, the area needs to be shielded from contamination, dust, and rain. To protect the curing surface, temporary covers or barriers may be put in place.
Step 9: Last Exam and Cleaning
The installation crew performs a last walkthrough following complete curing in order to:
Verify the surface integrity, color consistency, and smoothness.
Clear the area and get rid of any obstacles, trash, or tools.
Give the customer maintenance advice, such as frequent brushing, mild pressure washing, and preventing oil spills.
In 2025, the Middle East is witnessing a significant surge in the demand for decorative concrete, driven by a blend of aesthetic aspirations and practical necessities. This trend is reshaping the region’s architectural landscape, influencing both residential and commercial sectors.
It has evolved beyond its utilitarian roots to become a preferred choice for those seeking both beauty and durability. Homeowners are increasingly opting for stained, stamped, and polished concrete finishes that offer a sleek, modern look while withstanding the region’s harsh climate. Developers, on the other hand, appreciate the material’s versatility, allowing for innovative designs that cater to a diverse clientele.
According to market research, its market in the Middle East and Africa is projected to reach approximately USD 947.14 million by 2025, reflecting a steady growth trajectory . This growth is fueled by increased construction activities, urbanization, and a shift towards sustainable building practices.
The push for sustainable construction has positioned decorative concrete as an eco-friendly alternative. Its ability to incorporate recycled materials and reduce the need for additional finishes aligns with green building standards. Furthermore, advancements in concrete technology have led to the development of self-healing and 3D-printed concrete, offering enhanced durability and design possibilities .
At the forefront of this movement is GH Interiors, a company renowned for its innovative approach to decorative concrete solutions. With a portfolio that spans residential villas to commercial complexes, GH Interiors has consistently delivered projects that exemplify the fusion of form and function. Their commitment to quality and sustainability has made them a trusted partner for those looking to incorporate decorative concrete into their spaces.
The rising demand for decorative concrete in the Middle East is a testament to the region’s evolving architectural preferences and commitment to sustainable development. As homeowners and developers continue to seek materials that offer both aesthetic appeal and practicality, decorative concrete stands out as a compelling choice. With industry leaders like GH Interiors leading the way, the future of decorative concrete in the Middle East looks promising.
At Good Hand Stones and Concrete Flooring LLC, we earned our reputation through our mastery of exterior works — from exposed aggregate finishes and stamped concrete to brick cladding and interlock paving. Our projects brought structure, durability, and beauty to outdoor spaces across the UAE. But as we continued transforming exteriors, a natural question emerged: Why stop there?
That question became the seed of a new venture — GH Interiors An Interior Design Company in Dubai.
Here’s the story behind our journey from outdoor expertise to indoor excellence:
Many of our satisfied clients began asking if we could handle their interior projects too. They had seen the quality, commitment, and professionalism we brought to every exterior job — and they wanted the same touch indoors.
Our exterior work isn’t just about laying tiles or pouring concrete — it’s about creating spaces that flow with the architecture. This made our transition into interior design and fit-out work smooth and intuitive.
We didn’t just want to build beautiful exteriors; we wanted to help clients create complete living experiences — from gate to garden, foyer to finishing. GH Interiors was born from that passion.
With the right architects, designers, and project managers on board, we formed a specialized team under GH Interiors that focuses solely on creating bespoke, functional, and elegant indoor spaces.
Today, our clients benefit from a seamless experience — from outdoor surfaces and landscape finishes to complete interior fit-outs, custom joinery, and furniture selection. One team, one commitment to quality.
From the ground beneath your feet to the ceiling above your head — we’re here to shape every corner of your space.
📍 Stay tuned as GH Interiors continues to redefine spaces with elegance, efficiency, and a design-first approach.
Together, GH Interiors and Good Hand Stones and Concrete Flooring LLC offer complete inside-out solutions for your space.
Choosing the right material is an important consideration when designing the exterior of your house.
Brick and stone cladding are two common options.
Both materials offer unique benefits and appealing looks, but which is the best choice for your home?
This article will examine the differences between brick and stone cladding, taking into account aspects such as longevity, cost, maintenance, and overall aesthetic impact.
Clay is shaped and baked in an oven to create brick, a traditional building element.
Brick’s enduring strength and classic appearance have made it a popular choice for construction for many years.
Bricks can be used to create both traditional and modern home designs because they come in a variety of sizes, colors, and textures.
Brick has a classic look that complements many different architectural styles.
Regardless of your preference for sleek gray or white brick or the classic red brick, this material adds character and appeal to any home.
The brick house stands out because of its timeless charm, which has endured over time.
Stone cladding is the process of applying a thin coating of either natural or artificial stone to a building’s exterior.
This technique provides the look and feel of a solid stone structure without the weight and cost that come with it.
Stone cladding can improve the look of various surfaces, including facades, walls, and columns, giving any home a sophisticated yet organic charm.
Because of the need for specialized knowledge and tools, installing stone can be more difficult and time-consuming than brick. A smooth and aesthetically pleasing surface is produced by careful arrangement and fastening of the stone components. The longevity and performance of the stone cladding depend on correct installation.
A time-honored technique honed over millennia, brick laying is well known. Experienced bricklayers can quickly build brick walls, therefore guaranteeing a stable and robust structure. Brick is a simple and consistent choice for house exteriors since the concrete used in brick construction offers more strength and stability.
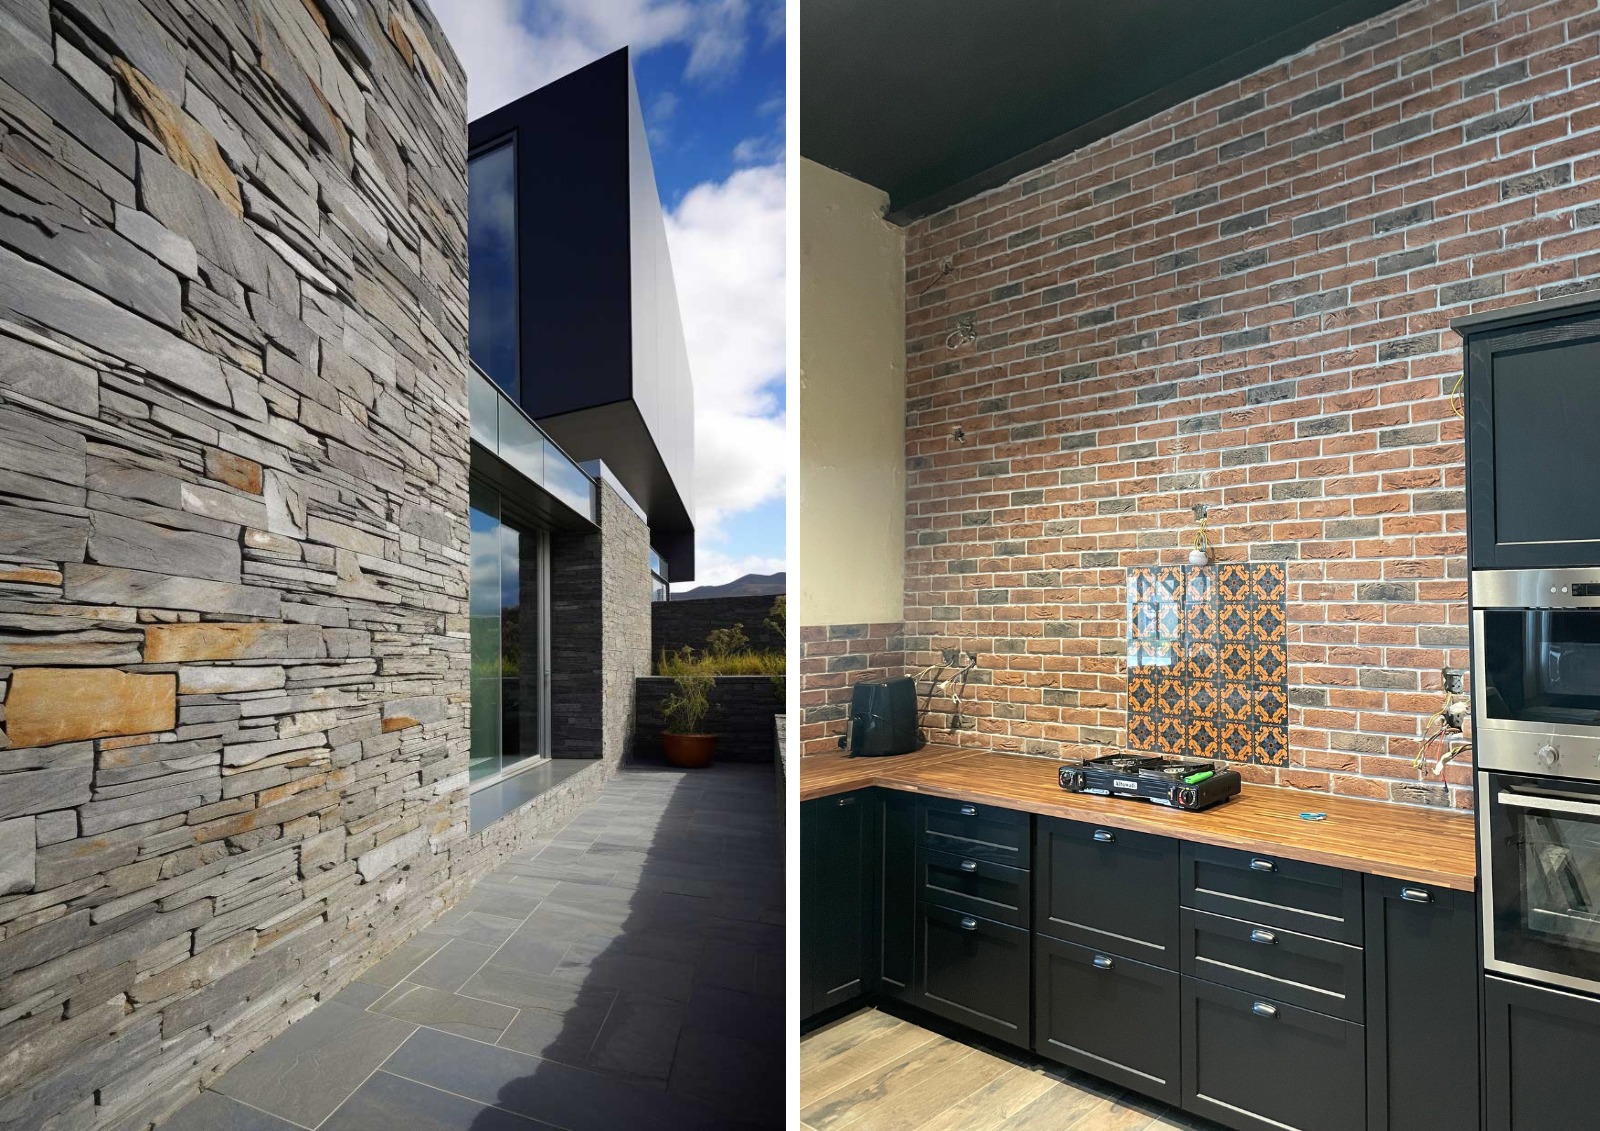
The environmental effect of stone cladding varies with the kind of stone used and the extraction method. Natural stone is a limited resource; its extraction can greatly affect the environment. On the other hand, creating stone from recycled materials could be a more sustainable choice.
Made from plentiful natural materials like clay, brick can be recycled when its life is over. Though the manufacturing process for brick uses energy, technological developments have lessened the environmental effect. Furthermore, its durability and low maintenance needs help brick to be environmentally friendly.
By adding another layer of insulation, stone can increase your home’s energy efficiency. This can lower heating and cooling expenses and help control indoor temperatures. Stone’s thermal mass also helps maintain a stable indoor environment by absorbing and releasing heat slowly.
Brick’s thermal mass makes it a great insulator, assisting in the maintenance of a constant interior temperature. Brick walls lessen the need for artificial heating and cooling by absorbing heat during the day and releasing it gradually at night. Brick is therefore an environmentally friendly and energy-efficient material for building homes.
Your budget, preferred style, and upkeep needs are some of the variables that will influence your decision between brick and stone cladding for your house. While brick offers a classic, long-lasting option with exceptional energy efficiency, stone offers a luxurious and natural look with little upkeep. Both materials offer distinct benefits, and your particular requirements and priorities will ultimately determine which option is best for you.
Can you picture having an outdoor terrace that showcases your unique style and personality?
A beautiful space designed for relaxation, whether it’s soaking up the sun or having a casual meal with friends. If you are considering renovating your terrace, we recommend using microcement, a contemporary and durable material known for its exceptionally stylish appearance. An outdoor terrace featuring microcement is on the rise in popularity, leading us to dive deeper into the topic with this article.
We have discovered the benefits of microcement on outdoor terraces through its use in many residences and from the feedback provided by our clients. Following are some of the benefits of micro topping or microcementing.
Weather resistance: as previously stated, microcement is extremely durable against UV rays, rain, moisture, and temperature fluctuations.
For this reason, it is perfect for outdoor terraces, as it can endure harsh weather conditions.
Durability: It has a long lifespan and requires minimal maintenance over the years.
Keeping it clean: minimal effort is needed to clean microcement, and adhering to the supplier’s instructions will ensure optimal cleanliness.
In one of the previous post we talked about it, so don’t miss the complete guide on how to clean microcement according to Cementec.«
Customization: It offers the possibility to customize both color and finish, allowing you to achieve the outdoor terrace of your dreams.
Applying the correct microcement on the floor can result in anti-slip characteristics, making it a reliable selection for outdoor locations where walking safety is a priority.
Before starting the microcement application process, it is essential to carefully examine the condition of your current tiles.
Keep an eye out for any blemishes, such as chips, inconsistent surfaces, or tiles that are not properly fixed, as resolving these concerns is vital to creating a sturdy surface for the microcement.
Ensure your tiles are prepared for the microcement application by cleaning them extensively to eradicate any residue of grease, dust, or other impurities.
Make use of the right cleaning agents and approaches to obtain a perfect surface.
It is important to provide enough time for the tiles to dry thoroughly, as proper drying is critical for ensuring the best adhesion of the micro cement.
Acquiring a flawless and level surface is key for the accomplishment of your micro cement project.
Start by meticulously filling the tile joints to establish a flawless foundation.
Following that, use an appropriate primer that serves as a link between the tiles and the micro cement, improving adhesion and guaranteeing a long-lasting outcome.
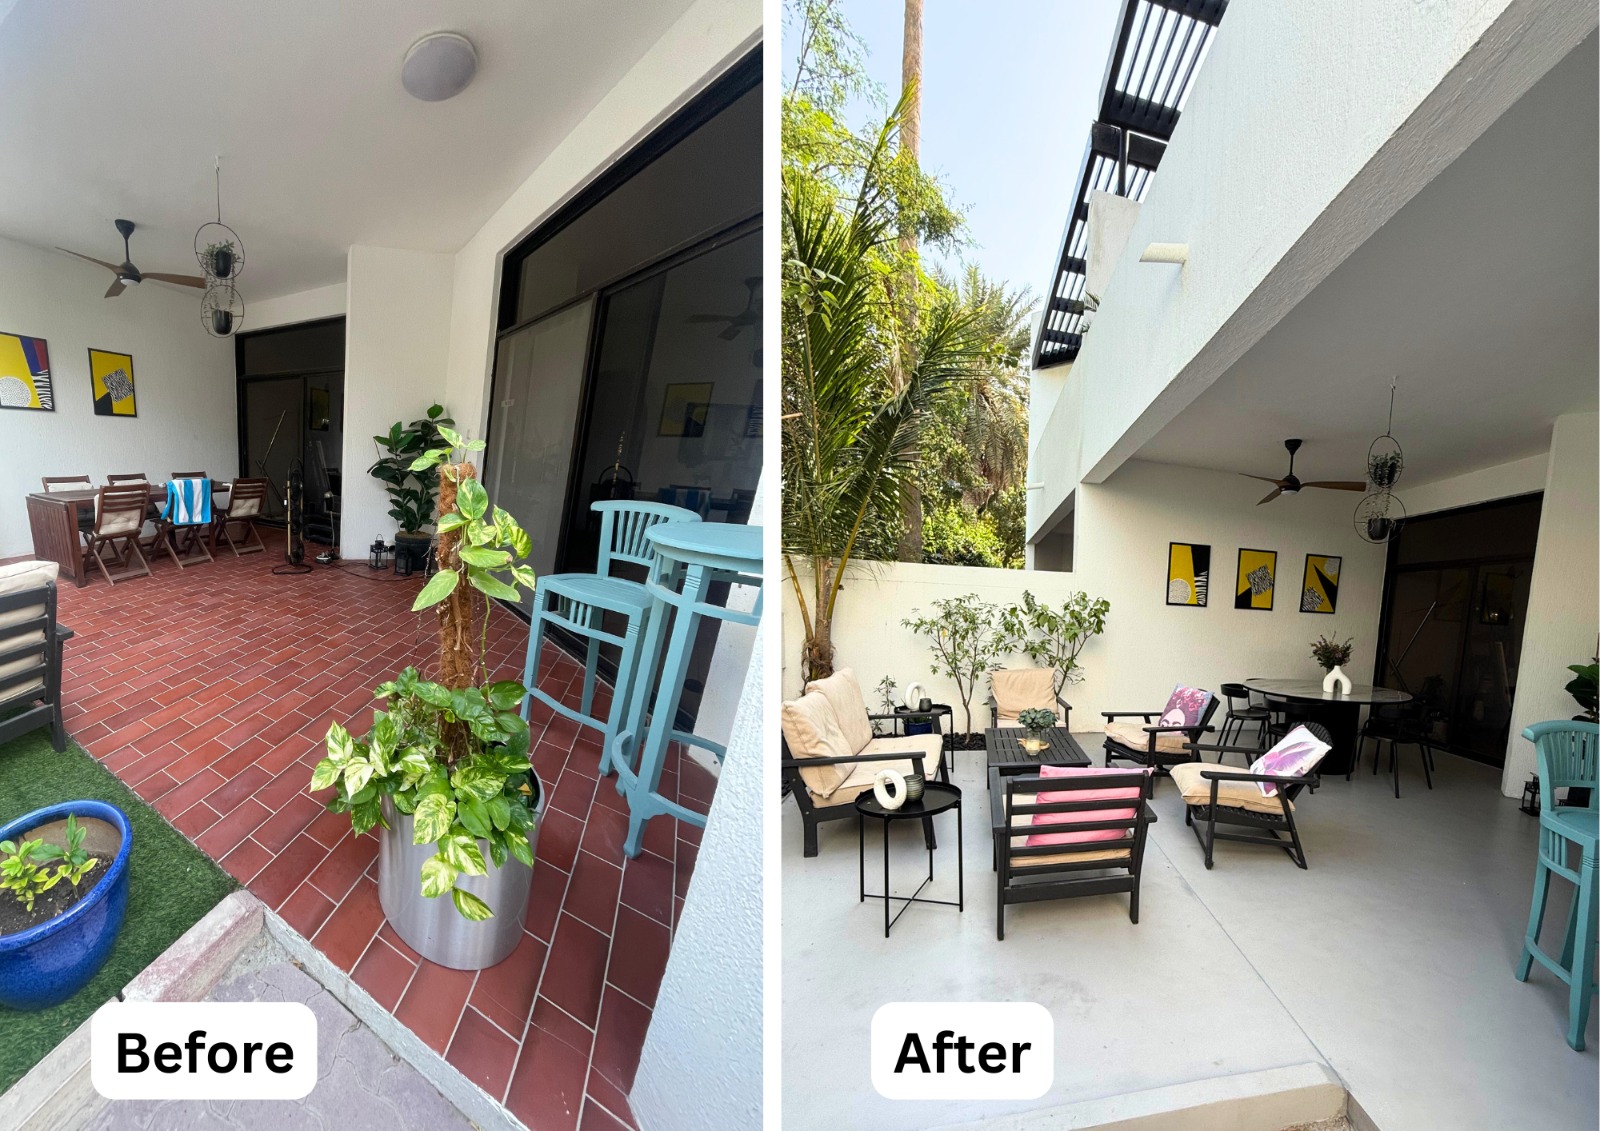
Microcement
Selecting the right primer that is customized for your specific surface is crucial for achieving optimal results.
Once the primer has fully dried, reinforce the surface by incorporating a layer of fiberglass mesh.
Adding this extra layer helps protect against potential cracks and bolsters the structural integrity of the microcement coating.
Continue with the application of the initial coat of microcement base, pigment-free, to guarantee an even coverage on the entire surface.
Building on the foundation created by the first base layer, apply a second layer of microcement base, this time with the pigment of your chosen hue.
Exercise precision and attention to detail to ensure a flawless and uniform application, correcting any flaws or blemishes as you go.
Sealing the surface is the final step in the process of applying micro cement, ensuring protection from external elements and the longevity of its appearance.
Opt for a premium sealant that works well with microcement surfaces and apply it diligently to achieve thorough coverage.
This layer of sealant improves the longevity, resilience against damage, and simplifies the upkeep of the micro cement coating.
Perform a comprehensive examination of the microcement surface to guarantee quality and uniformity. Address all imperfections or irregularities, and complete any essential final adjustments to attain results of professional quality.
By diligently following these detailed steps, you can enhance your current tiles using the adaptable appeal of microcement, resulting in impressive and durable outcomes.
Even though we are disclosing the procedure to you, we strongly recommend seeking help from an expert similar to ours. At Good Hand Stones and Concrete Flooring, our skilled applicators guarantee a smooth renovation process, reducing typical microcement issues.
Exposed aggregate flooring is more than simply a surface; it’s a strong statement of personal style. With a breathtaking array of hues and stones, each driveway displays a distinct taste and preference. Its versatility makes it an excellent choice for a variety of architectural types, whether you favor the clean lines of modern design or the allure of classic elegance. The rough finish created by exposing the underlying pebbles and stones adds a natural, inviting feel to any property.
When used for driveways, exposed aggregate not only adds charm to the façade but also creates a unique texture. The exposed stones’ varied colors and sizes offer a stunning visual contrast, improving the driveway’s overall beauty.
This method allows homeowners to personalize their driveways to their preferences by selecting from a variety of aggregates such as granite, quartz, and limestone. This adaptability ensures that each driveway has a unique appearance that complements its surroundings.
Use a mix of pebbles and stones to achieve a rustic or modern look.
Add custom hues to the stones for a vibrant or subtle effect.
Frame exposed aggregate surfaces with smooth or stamped concrete for added contrast.
Combine the textured look with a sleek, glossy finish for a refined appearance.
Incorporate glass, shells, or other decorative items for a personalized touch.
We discussed an outline of the steps in our exposed aggregate concrete guide, but that just scratches the surface of the overall process. Here’s a more extensive guide, along with some troubleshooting hints.
The installation process begins with excavating the area to the desired depth, which is generally between 4 and 6 inches. It is critical to clear all waste and vegetation and verify that the ground is level. A sub-base material, such as gravel, is then used to provide stability and drainage.
If you encounter soft or unstable soil, reinforce the base with additional compacted gravel or consult a professional for soil stabilisation options. Before digging, always check for underground utilities and use a compactor for an evenly compacted base, ensuring long-term stability.
Setting up wooden forms or metal borders is essential for defining the shape and level of the concrete surface. These forms must be firmly supported and exactly level.
If the forms change when pouring, it is critical to pause and readjust them to achieve constant thickness. Double-check measurements and use a level to confirm that forms are accurately put up. Consider the weather conditions; windy days might cause forms to misalign, so try to avoid them.
The following stage is the most challenging of all. It involves combining concrete with the desired aggregate to get a consistent consistency. Carefully pour the concrete into the molds, making sure it is evenly distributed. If the mix is too dry, add water slowly; if it is too wet, add additional concrete mix.
Uneven distribution can result in weak regions. Preparation is essential, so have sufficient labor and tools ready. Pre-wetting the aggregates if they are dusty is also important, as dust can reduce the strength of the concrete.
Once poured, the concrete must be leveled using a screed board and smoothed with trowels to provide a flat surface.
If low places are discovered, they should be filled with more concrete and releveled. Overworking the surface might weaken the top layer, so avoid doing so. To avoid delays, work swiftly but thoroughly, making sure that all tools are available and that the crew is well-coordinated.
Depending on the desired finish, exposing the aggregate is an important aesthetic step that can be accomplished by water washing or using a surface retarder. This is done when the concrete has begun to cure but is not completely hardened.
If the aggregate is not sufficiently exposed, gently reapply the procedure, but be careful not to overexpose, as this can dislodge the aggregate. Testing a small area initially can assist determine the best timing for exposure and guarantee even coverage of the surface.
Finally, the concrete needs to be allowed to cure correctly. This procedure can take many days and is required for the concrete to reach its maximum strength.
To avoid rapid drying, use a curing compound or keep the surface damp. Otherwise, it may crack. Monitoring weather conditions is also necessary while planning for the curing process. It is always a good idea to avoid excessive traffic on new concrete during this time.
Exposed aggregate driveways offer a perfect blend of durability, aesthetics, and personalization. With a variety of design options and a meticulous installation process, homeowners can create a stunning and long-lasting surface that complements their architectural style. Whether you prefer a rustic charm or a sleek modern finish, exposed aggregate is a versatile choice that enhances curb appeal while ensuring strength and resilience. By following the proper installation and curing steps, you can achieve a driveway that not only stands the test of time but also reflects your unique taste.
Micro cement has gained tremendous popularity in recent years for both interior and exterior design. This innovative coating is now a go-to choice for renovating homes and businesses, thanks to its many benefits.
In this article, we will explore the key advantages and disadvantages of this versatile continuous coating. Our goal is to provide clarity and help answer any questions you might have about it.
One of the most significant advantages of microcement. There is no need to use machinery because the coating is continuous and does not require expansion joints. Microcement is applied to the surface material being renovated, such as a floor, wall, ceiling, swimming pool, or furniture. There is no building work necessary, hence no rubble is generated. Not to mention the sense of spaciousness it adds to any environment.
One of the most distinguishing features of microcement is its thinness, which ranges between 2 and 3 mm. This benefit means that whatever material is used to apply the smoothed microcement coating, the structural load of the building will be unaffected.
The final but not least advantage of microcement is its high thermal conductivity. Smoothed microcement has the advantage of being entirely compatible with underfloor heating. In reality, it is one of the most effective building materials for underfloor heating.
The textures that may be created with microcement are unique. Multiple finishes are available based on the application, pigment choice, and, most importantly, sealer employed.
We offer a wide range of varnishes to suit the finish you want for the surface coated with smoothed microcement: gloss, matte, super matte, satin, and even non-slip and waterproof.
Because of the extensive microcement color palette, this coating can be customized to any degree. Pigments that give surfaces their own identity.
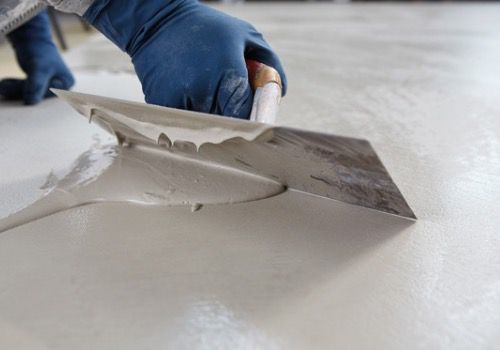
The steps for applying microcement are highly specialized. Changing the order or making mistakes in the procedure, particularly in priming and sealing, will result in an undesired outcome. As a result, we insist on having a competent applicator install smoothed microcement. The most common microcement application mistakes are described below.
Pigmenting microcement appropriately is critical. If the directions are not strictly followed, there may be an excess of clusters, resulting in dark streaks on the microcement coating surface.
The pigment should also be briskly stirred until the liquid is uniform and free of defects. Then, pour a small amount of the mixing liquid into a container, add all of the pigment, and stir thoroughly.
The recommended temperature range for applying microcement is 15ºC to 25ºC. Installing the coating at temperatures below 15ºC or above 25ºC may cause issues.
If the temperature is too low, which happens throughout the winter, the microcement-coated surface may take a long time to harden properly. On the other side, if the temperature is too high, the micro cement will harden prematurely.
Certain processes must be performed precisely when applying microcement. Failure to adhere to them can have serious consequences for the end outcome.
The application of micro cement to floors or walls, for example, is not the same. The type of smoothed microcement to be used varies. Similarly, failing to prepare and level the existing substrate to be coated can result in significant complications in the future.
Neither can you make mistakes in the priming of the substrate or in the sealing of the substrate.
We received a call from a client in Abu Dhabi who required assistance revitalizing their stamped concrete surfaces. These surfaces had seen a lot of use over time, resulting in significant wear and tear. Our goal was clear: to repair and revitalize the surfaces while retaining the attractiveness of the original design. Our goal was to create an outcome that not only looked good but also stood the test of time, ensuring beauty and strength for many years to come.
Structural Integrity:
We took a careful and systematic strategy to restoring the imprinted concrete surfaces:
Site Assessment:
Surface Preparation:
Restoration Process:
Pattern Re-creation:
Sealant Application:
Final Inspection:
Aesthetic Restoration: The stamped concrete surfaces were returned to their previous state, with brilliant colors and patterns restored to their full potential.
Enhanced Durability: The use of sealants and protective coatings increased the concrete’s resilience to environmental deterioration, increasing its lifespan.
Client Satisfaction: The client was happy with the prompt execution and high-quality results, and he expressed trust in the restoration’s lifespan.
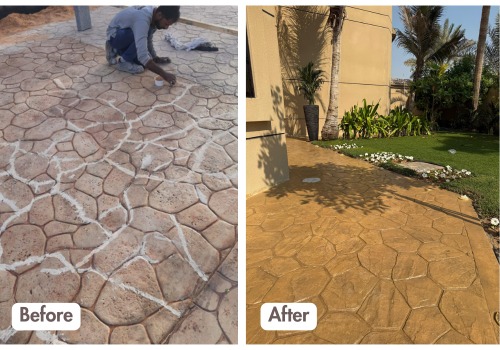
Stamped Concrete
With years of experience in stamped concrete repair and restoration, Good Hand Stones and Concrete Flooring specializes in revitalizing old, worn-out surfaces. Our meticulous attention to detail, high-quality materials, and dedication to client satisfaction make us the best choice for stamped concrete projects.
This project illustrates our commitment to restore both the utility and the aesthetics of concrete surfaces. We restored the stamped concrete in Abu Dhabi’s esthetic attractiveness as well as its structural integrity using skilled techniques and high-quality materials.
Brick cladding also referred to as brick slips is a material used to cover the exterior of a building. In its most basic form, it is a full size brick that has been cut down to give you a brick slip of 14-20mm for which you would then use to clad either the internal or external elements of your home.
It is often also used on commercial buildings such as high rise offices and restaurants because it gives them an attractive appearance that makes them stand out from their competitors and also offering more benefits then using traditional brick (mainly the space saving) Brick-cladding comes in many different shapes, sizes, colors and textures so you can find one that fits your style perfectly!
Brick-cladding can improve the curb appeal of any residential or commercial property, especially when including some of the features named above. Brick wall cladding can also be available in a variety of colours and textures to match other elements of a nearby building.
Brickcladding protects the internal structure of the building from a variety of potential issues such as cracks, and impact damage due.
Brick cladding is much easier to maintain than nearly every other cladding material. It rarely needs to be cleaned in order to keep it looking its best, and as it is made from a natural product it tends to weather gracefully increasing its character.
Brick cladding is a method of insulating buildings from noise and heat loss, when combined with an insulated system, It’s especially useful for properties located in urban areas
Brick cladding insulation will improve temperature regulation, which in turn will result in long-term energy savings.
Brick cladding protects buildings from water penetration and can prevent costly internal damage that may be difficult to repair caused by dampness, mould or other external pollutants.
It has both aesthetic and practical advantages that can increase the property’s value, this is particularly noticeable on buildings that have had an overclad system to improve the image of the building.
Brick slip cladding can be installed at a fraction of the cost of constructing a brick wall, and in a quicker time frame also. Brick slips can also be purchased in half-square meters, which allows for small areas to be covered at a much lower cost.
Our Brick slips are manufactured and are designed to last the lifetime of the building if installed properly by a professional. Hence, it’s best to choose us for your next brick-cladding project. With a team of skilled professionals, we ensure high-quality craftsmanship and seamless execution, delivering results that stand the test of time.
Our bricks are inert, incombustible, and will provide greater protection against heat and fire.
Considering the exceptional strength, thermal insulation, weather resilience, timeless appeal, and cost-effectiveness highlighted above, it is evident why bricks continue to be the best choice for durable construction in Dubai. Their ability to combine functionality with aesthetics ensures that buildings not only stand the test of time but also meet the region’s unique architectural and environmental demands
Stone cladding has become a popular option for homeowners wishing to add a touch of elegance and natural beauty to their homes. Using it for modulating walls can radically change the appearance and feel of your house, providing a focal point.
In this blog, we will study how to properly utilize it for modulating walls, explain various advantages of cladding textures, and provide ideas on incorporating it into the interior design of your home.
When applied to your home’s modulation walls, it provides a number of advantages. It gives a timeless and organic elegance that goes well with both modern and rustic design styles.
This is a practical option for homes because it is low maintenance and long-lasting. It can also improve the insulation of your walls, which will help your house use less energy.
Think about the stone’s texture and type while choosing it for your house. There are options for rough, rustic textures as well as slick, contemporary finishes. Select a stone cladding texture that blends nicely with your home’s general design theme. Regardless of your preference for engineered or natural stone, make sure it blends in with the interior’s color palette and design.
Of course, the stone cladding wall looks gorgeous both inside and out. Install granite wall cladding in your kitchen for a more contemporary look, or marble stone cladding in your bathroom for a more opulent appearance. With so many different materials and varieties of natural stones to choose from, you’ll have no trouble creating the mood you want for your home’s interior design.
A stone-clad home has a timeless appeal since it recreates a historical material in a new, fresh design that distinguishes it. Exterior wall cladding stone is typically used to cover a home’s exterior or to create one or two accent walls. A property with grey cut stone outside walls exudes refinement, while a stone-walled balcony provides a bright and welcome entry.
However, nature has other ideas. There will be rain and changes in weather that may alter these stones. However, you may protect your external stonework from the elements in a variety of methods.
In the summer, the garden is bliss, and even in the winter, it can be enjoyable to look at from the coziness of a window seat. Garden walls, with the correct stone finish, can be practical boundary marks or a landscape feature that acts as a stunning backdrop for the garden’s plants and other elements. Stone can also be used to cover lower walls, such as retaining walls around a landscaped slope.
Stone cladding instantly provides your structure a more natural appearance and improves its attractiveness. It makes exteriors easier to maintain and saves money.
Aside from appearance, there are several other advantages to using stone cladding. Some of them are mentioned below.
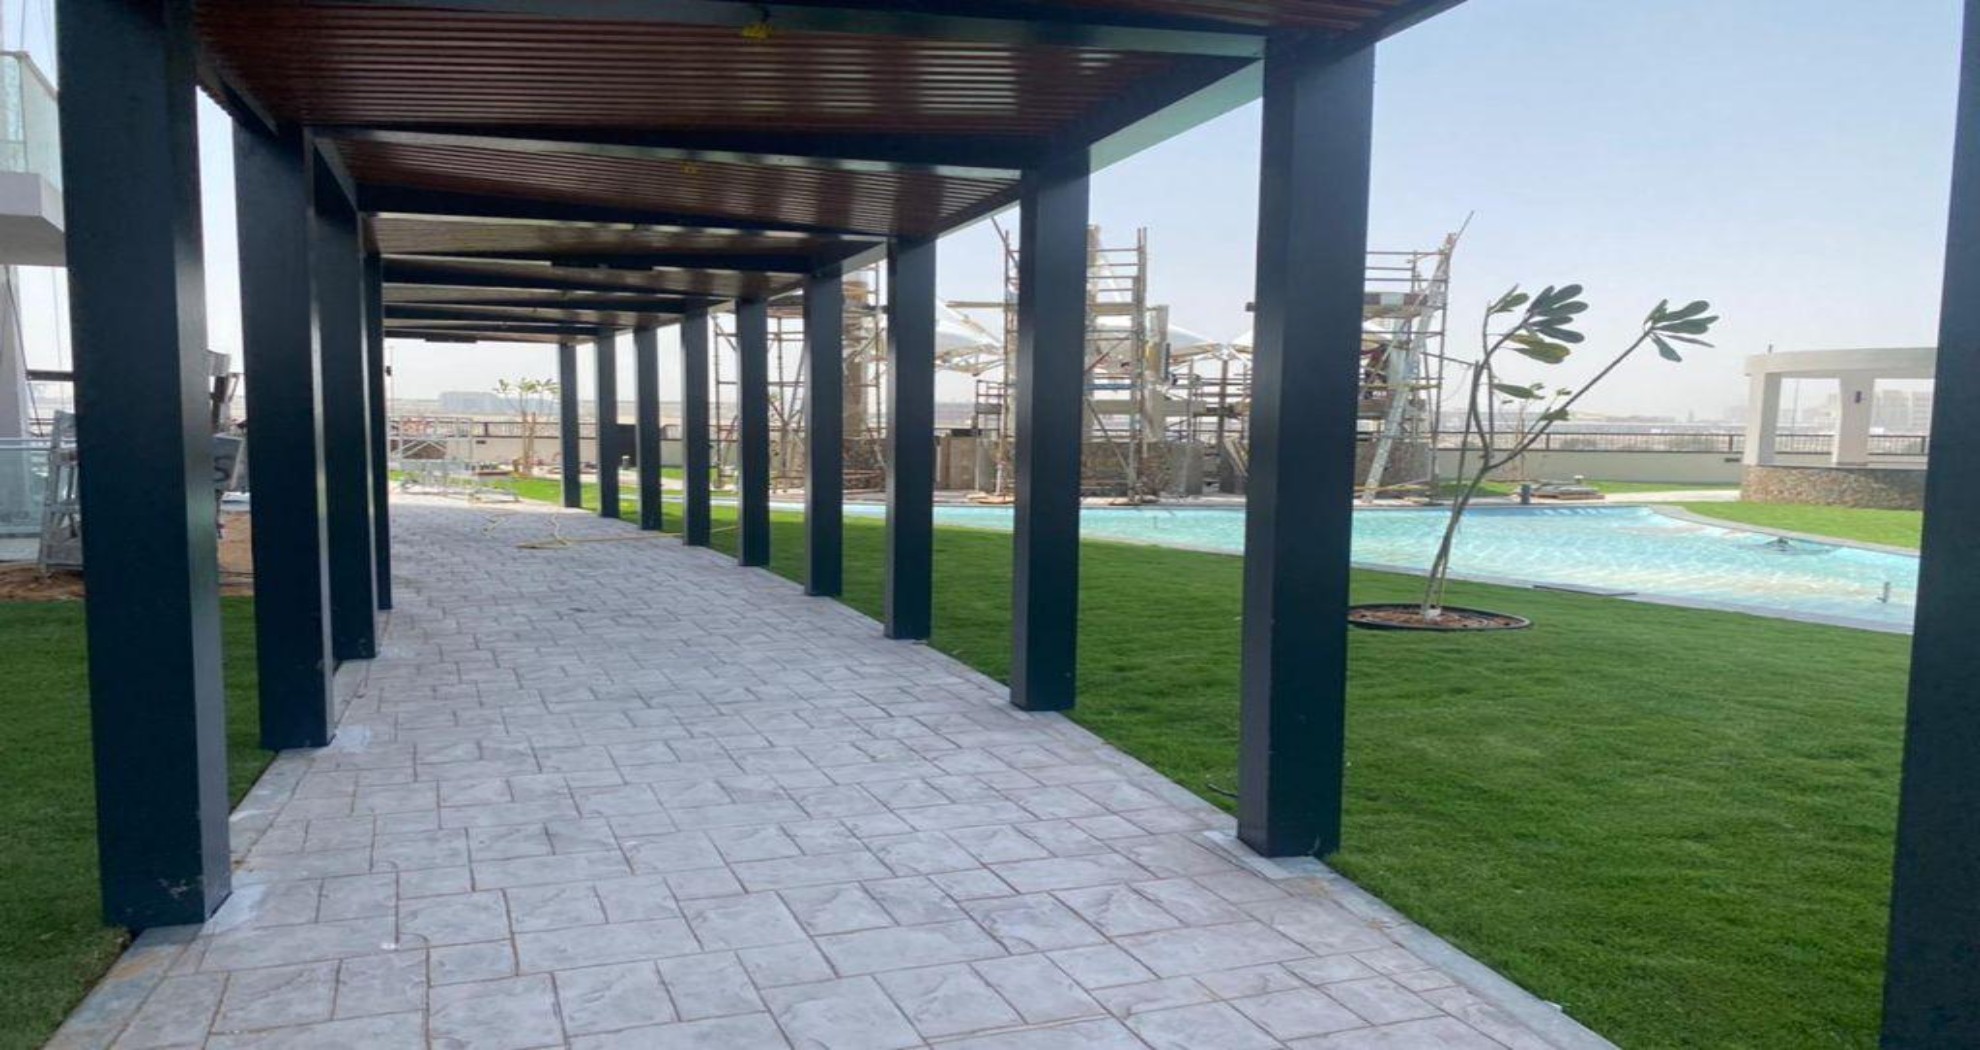
Stamped concrete is an affordable and multifunctional option for outdoor flooring, combining the strength of ordinary concrete with the visual attractiveness of more costly materials like stone or brick. Even the best-installed stamped concrete surfaces can sustain damage from extreme weather conditions like intense heat, freezing cold, or heavy precipitation. Particularly if you reside in a region with harsh weather, like UAE, proper care and upkeep are necessary to prolong its lifespan and keep it looking fantastic. We at Good Hand Stones and Concrete Flooring LLC are here to provide knowledgeable advice on how to take care of your stamped concrete in challenging environments since we recognize how important it is to preserve it.
Before we get into specific care recommendations, it’s important to understand how extreme weather can affect stamped concrete. Concrete is porous by nature and prone to weather-related wear and strain. Concrete can expand and compress in very hot or cold temperatures, resulting in cracks and surface damage. Excess moisture from rain or snow can also infiltrate the concrete, causing it to weaken and discolor or scale on the surface.
Frequent exposure to rain, snow, or humidity can allow water to penetrate the surface of stamped concrete, causing erosion, material weakening, and surface damage.
The sun’s UV rays can fade and discolor stamped concrete’s vibrant patterns and hues. The heat may also induce surface cracks due to expansion.
In colder areas, the freeze-thaw cycle poses a significant risk to concrete surfaces. Water can escape into the concrete’s microscopic pores, and as temperatures drop, the water freezes and expands, potentially resulting in cracks.
Now that we’ve covered the fundamental weather challenges, let’s look at how to care for stamped concrete so that it can withstand extreme temperatures.
If a stain forms on your stamped concrete surface, a little elbow grease will typically help remove it. Warm water can help remove many stains. If you’re still having troubles, there are a few simple things you can try.
Power washing, which can be effective, especially for stains. An alkaline degreaser can help break down grease and oil and, when used as directed, should not harm stamped concrete. It is best to question your contractor about the goods he or she advises.
Remember that there is oil even in dirt, so even if you don’t identify your problem as a “grease stain,” this type of cleaner chemical may nevertheless help.
Using a high-quality sealer is one of the best ways to protect stamped concrete from the elements. Sealing your stamped concrete generates a protective covering that prevents moisture from permeating the surface, avoiding water damage and cracking during freeze-thaw cycles. Furthermore, a UV-resistant sealer can help prevent the sun’s rays from fading the colors in hot climates.
However, this sealant will eventually break down. Power washing, sweeping will help extend the life of the sealant but repair and restoring can help to extend it life even further. This varies depending on how the surface is used and the climate. Obviously, hard winters and scorching summers can hasten degeneration.
In any event, a new coat of sealer will need to be applied after a reasonable amount of time. Doing this on time will help to preserve the underlying surface in better shape.
Before applying a new layer, make sure the surface is well cleaned and dried. Otherwise, imperfections may occur on the surface. It takes some planning to ensure that you don’t get stuck in a corner and that you evenly coat the entire area.
Of course, if you detect severe wear—for example, on the main walkway where everyone walks—you should consider having it repaired and sealed sooner.
Proper sealing will help to maintain the color and prevent it from fading. Yes, it is possible to recover a fading surface, but it is far more practical to conserve it in the first place.
It is possible for you to do this yourself, but we suggest hiring an expert unless you are an experienced do-it-yourselfer. As a team of experienced professionals specializing in the repair and restoration of stamped concrete, we pride ourselves on delivering high-quality services at a reasonable cost. Whether it’s repairing cracks, addressing discoloration, or restoring the original finish, we ensure durable and visually appealing results tailored to your needs.
Get in touch with us today for a personalized quote and let us help you revamp your stamped concrete surfaces anywhere in the UAE. Restore beauty and functionality with our expert repair and restoration services!
Exposed aggregate concrete is a type of concrete characterized by a screed in which the aggregate materials are partially exposed after being subjected to a special treatment. In this way, the concrete aggregates protrude from the surface and are visible to the naked eye. In this decorative finish the concrete is bare, being perceptible to anyone, thanks to the use of a concrete deactivator that delays the setting of concrete. That is why it attracts so much attention for its particular aesthetics.
Cement, water and stone granules make up exposed aggregate concrete which, depending on the type of stone and colour chosen in its formulation, will offer one type of decorative finish or another. This roughness that endows the stone is what triggers its non-slip texture and high resistance to the action of external agents and weather conditions.
It is used in many parts of a property, both commercial and residential. You can have it installed in driveways, pathways, al frescos, pool surrounds, and more. The mentioned areas, as you may already know, are those that demand good looks and reliable performance. You do not want to waste money on useless flooring that can even cost more yet does not offer the same benefits of exposed aggregate.
The versatility of exposed aggregate concrete allows for a variety of design options. Here are some popular design ideas:
One popular design choice is to use contrasting aggregates or other materials for the borders of a driveway or walkway. This creates a visual frame around the main surface, adding a striking design element.
Mixing different types of aggregates can create a unique look. For example, combining smooth river stones with jagged crushed gravel creates an interesting contrast in texture. You can also mix different coloured aggregates to create patterns or gradients.
Incorporating stamped concrete into an exposed aggregate surface can result in a visually interesting combination of textures. The stamped areas can mimic the look of brick, slate, or other materials, while the exposed aggregate adds texture and contrast.
Its concrete can be used to create geometric designs, such as circles, squares, or other shapes. This can be achieved by using different aggregates or coloring the concrete around specific shapes.
Stencils can be applied to exposed aggregate surfaces to create custom designs. These stencils are removed after the aggregate is exposed, leaving behind intricate patterns.
When consumers consider installing an exposed aggregate surface, its durability is a primary advantage. Exposed aggregate concrete has the structural integrity of concrete, thus, it is incredibly durable and can survive for at least 40 years with adequate care and maintenance.
However, several factors can impact their longevity. Surface cracks that are left unaddressed and improper maintenance practices, such as using high-powered pressure washers at damaging angles, can compromise the integrity of the surface. Regular upkeep and attentive care are essential to preserving the quality and lifespan of exposed aggregate.
Our incredible knowledge and experience in dealing with all kinds of concrete make us the best company to hire for this job. Here are some key benefits of choosing an exposed aggregate driveway:
When the upper layer of the concrete is exposed to show off the fine stones and materials imbibed inside, it actually creates a very nice and impressive effect on your driveway. So, the plus point of installing this kind of flooring in your house’s exterior is the increased curb appeal of the place.
Though the task of exposing the aggregate of the concrete might seem a tough one, it’s actually a very quick and easy procedure. If you call a great team to do the job, it happens within a day or two.
It is understandable that since it’s the home’s exterior you are worried about the constant dust and dirt. But don’t worry, you can just pressure wash your driveway if you install it and it would seem clean and gleaming like new.
Rest assured that when you are installing the exposed form of aggregate in your driveway, it is entirely non-skid and non-slippery. So, your driveway shall not be prone to accidents.
By choosing exposed aggregate, you’re not just upgrading your driveway; you’re enhancing your home’s overall functionality and aesthetics.
At Good Hand Stones and Concrete Flooring, we pride ourselves on being the premier choice for exposed aggregate in the UAE. With a commitment to using the finest materials and delivering exceptional craftsmanship, we ensure outstanding results every time. Whether it’s for residential or commercial projects, our expertise sets us apart. For your next exposed aggregate installation, trust us to provide excellence. Contact us today to discuss your requirements.
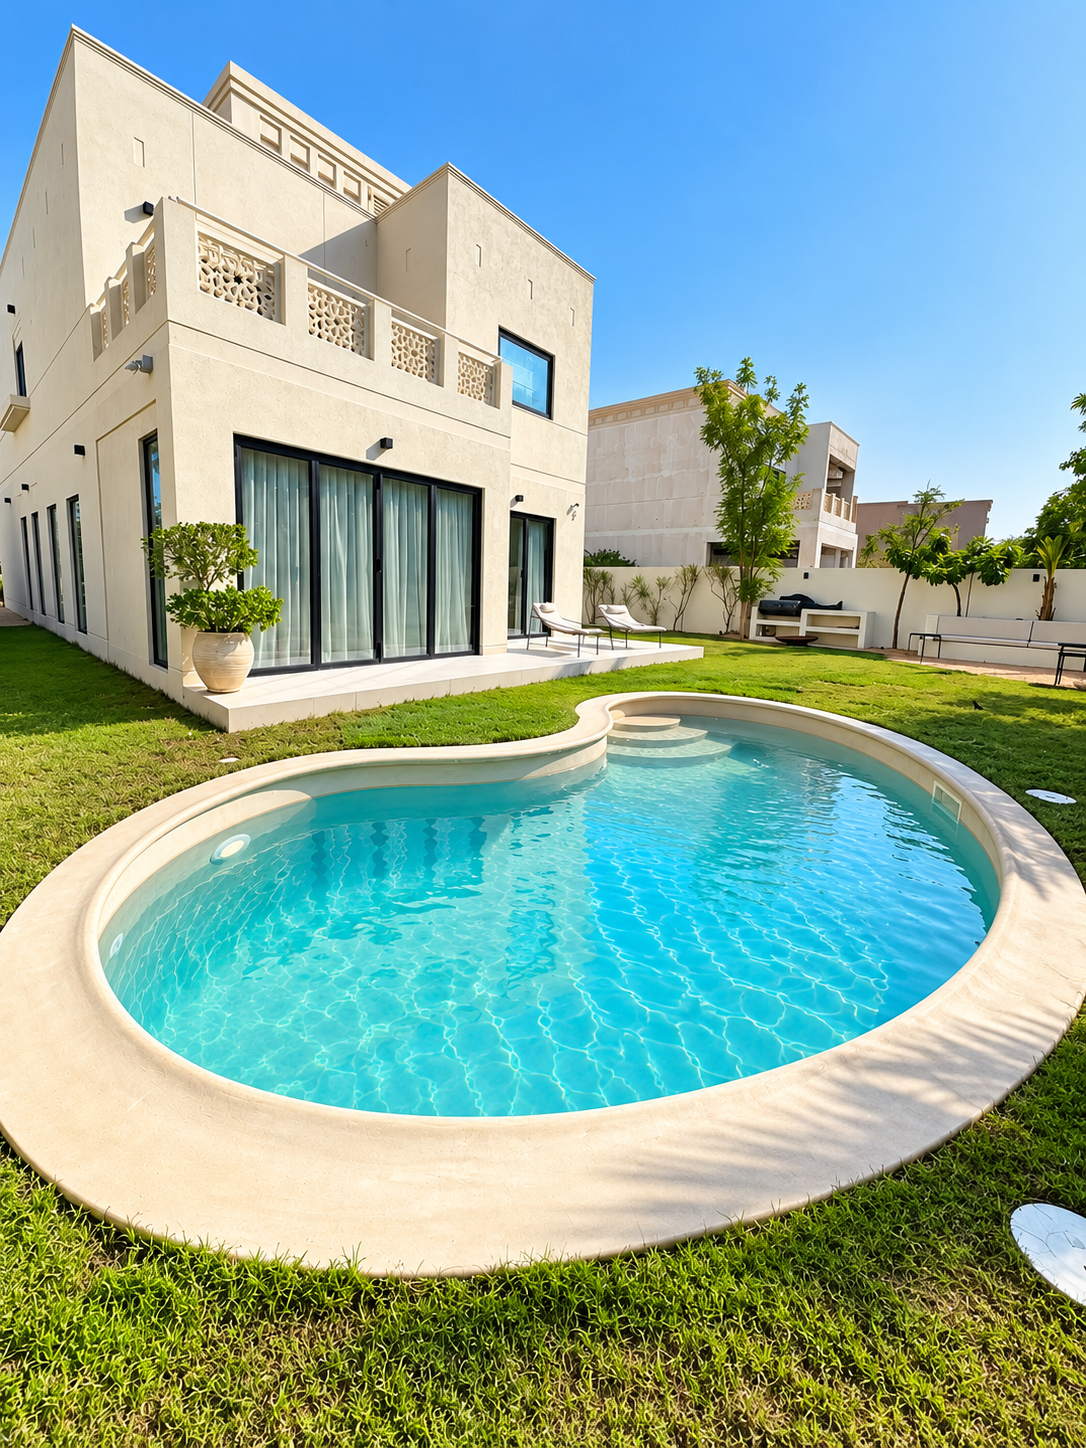

Share your email with us, and our team will help you explore the right finishing solutions for your project.
